
My Experiment
To gain a better understanding of this technology, I deployed the entire technology stack on a gaming laptop and worked out the details.
Methods
We need to capture a video of the target that shows all its relevant parts. For this experiment, I recorded two C-arm videos: one in the anterior-posterior view and another in the medial-lateral view. It took a few attempts before I succeeded, and there are some useful tips for capturing these videos.
Recording a High-Quality Video for Reconstruction
The surface of the C-arm is quite plain and lacks distinct features and color. This often causes problems when running sparse image reconstruction algorithms to estimate the camera’s poses, as the images lack sufficient features for matching.
To mitigate (though not completely eliminate) this issue, I placed “signposts” — objects that are easy to match and contain many visual features — around the C-arm. These included a keyboard, a colored tag, and a piece of paper with multiple printed icons and logos (see my results for details).
The video quality should be high—for example, 1080x1920 resolution at 30 frames per second. This quality is sufficient for this experiment, although many modern smartphones can capture videos at much higher resolutions, so a smartphone would also suffice.
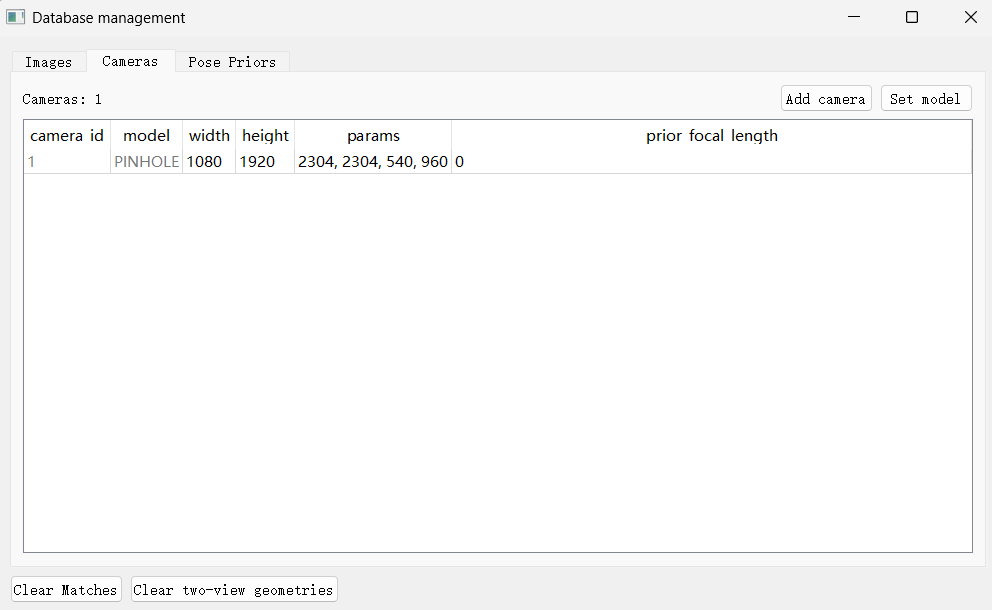
A basic prerequisite for this work is obtaining fairly accurate camera poses and camera properties. The smartphone camera can be modeled as a pinhole camera, which is supported by many neural radiance field and Gaussian splatting packages.
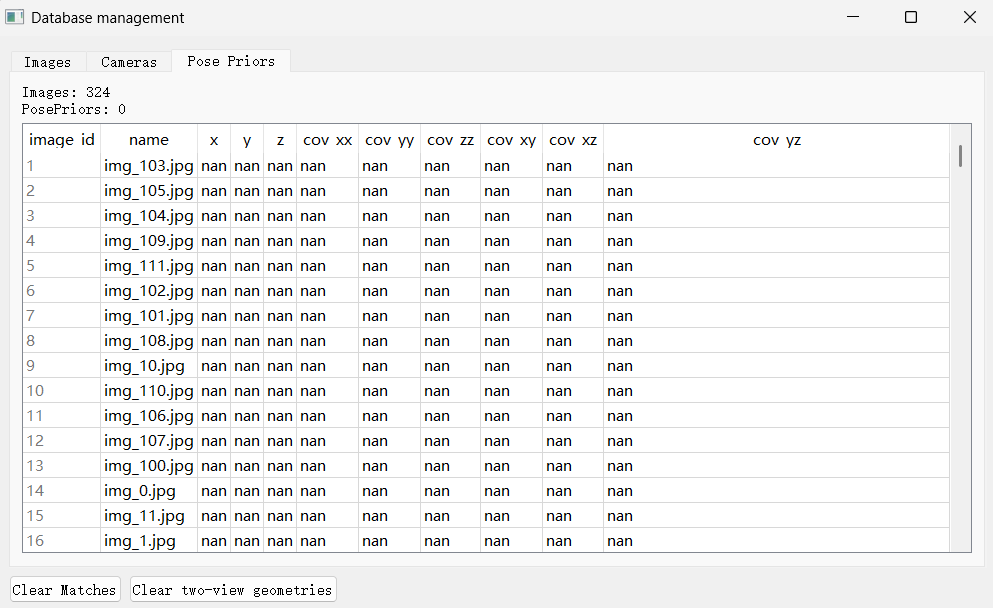
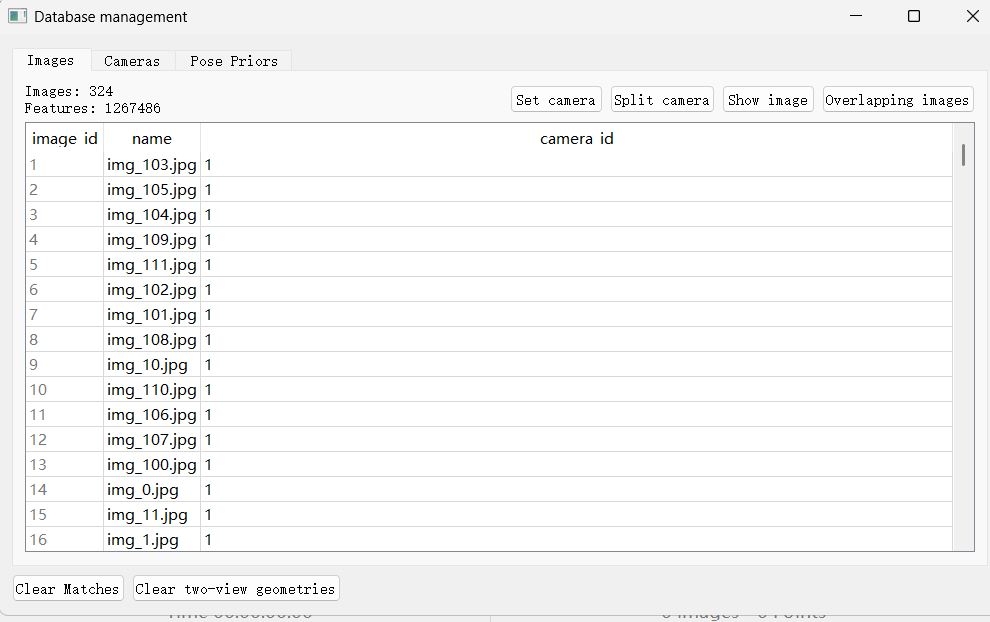
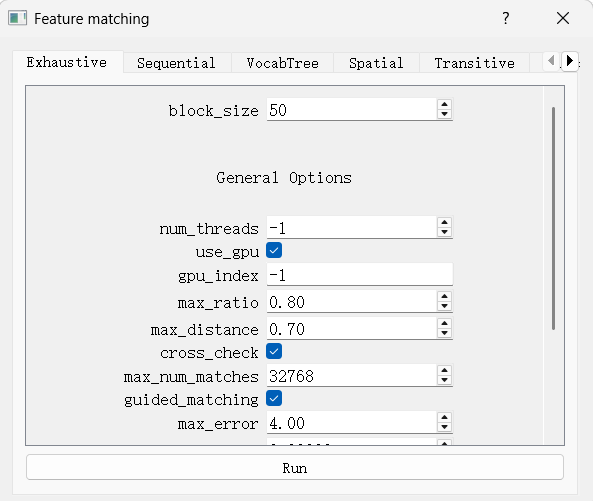
Since I did not have access to the camera’s properties and poses, I relied on COLMAP, a free and open-source software, to estimate both. COLMAP uses structure-from-motion algorithms to reconstruct scenes from images and is widely used in navigation, robotics, computer vision, and other fields.
However, COLMAP accepts only images as input, not videos. To convert video frames into images, I wrote a simple Python Jupyter notebook to perform this task.
import cv2
import os
import shutil

def clear_folder(folder_path):
    if os.path.exists(folder_path) and os.path.isdir(folder_path):
        # Iterate over all files and subdirectories in the folder
        for filename in os.listdir(folder_path):
            file_path = os.path.join(folder_path, filename)
            try:
                if os.path.isfile(file_path) or os.path.islink(file_path):
                    os.remove(file_path)  # Remove file or symbolic link
                elif os.path.isdir(file_path):
                    shutil.rmtree(file_path)  # Remove directory and all its contents
            except Exception as e:
                print(f'Failed to delete {file_path}. Reason: {e}')
    else:
        # If folder does not exist, create it
        os.makedirs(folder_path, exist_ok=True)


def calculate_sharpness(image):
    # Convert to grayscale
    gray = cv2.cvtColor(image, cv2.COLOR_BGR2GRAY)
    # Compute the Laplacian variance (higher means sharper)
    laplacian = cv2.Laplacian(gray, cv2.CV_64F)
    sharpness = laplacian.var()
    return sharpness

def calculate_contrast(image):
    # Convert to grayscale
    gray = cv2.cvtColor(image, cv2.COLOR_BGR2GRAY)
    # Contrast as standard deviation of pixel intensities
    contrast = gray.std()
    return contrast

def is_good_quality(image, sharpness_thresh=100.0, contrast_thresh=30.0):
    sharpness = calculate_sharpness(image)
    contrast = calculate_contrast(image)
    # You can print or log these values for debugging
    print(f"Sharpness: {sharpness}, Contrast: {contrast}")
    return sharpness >= sharpness_thresh and contrast >= contrast_thresh


def get_info(source, video_path):
    # Open the video file
    cap = cv2.VideoCapture(os.path.join(source , video_path))
    if not cap.isOpened():
        print("Error: Could not open video.")
        return

    fps = cap.get(cv2.CAP_PROP_FPS)  # Frames per second
    total_frames = int(cap.get(cv2.CAP_PROP_FRAME_COUNT))
    print("fps ", fps , ' total frames ', total_frames)
    cap.release()


def extract_frames(source, video_path, output_dir, interval_sec=None, interval_frame=None, tag=None):
    # Open the video file
    cap = cv2.VideoCapture(os.path.join(source , video_path))
    if not cap.isOpened():
        print("Error: Could not open video.")
        return

    # Create output directory if it doesn't exist
    if not os.path.exists(output_dir):
        os.makedirs(output_dir)
    else:
        print("clear folder")
        clear_folder(output_dir)

    fps = cap.get(cv2.CAP_PROP_FPS)  # Frames per second
    total_frames = int(cap.get(cv2.CAP_PROP_FRAME_COUNT))

    frame_count = 0
    saved_count = 0

    while True:
        ret, frame = cap.read()
        if not ret:
            break  # End of video

        # Decide whether to save this frame based on interval
        save_frame = False
        if interval_sec is not None:
            # Save frame every N seconds
            current_time_sec = frame_count / fps
            if int(current_time_sec) % interval_sec == 0:
                save_frame = True
        elif interval_frame is not None:
            # Save frame every N frames
            if frame_count % interval_frame == 0:
                save_frame = True
        else:
            # If no interval specified, save all frames
            save_frame = True

        if save_frame:
            # Check image quality: frame should not be None or empty
            if frame is not None and frame.size > 0:
                # the measurement is not reliable, it biases towards specific contents, leaving many parts of the video un-extracted
#                 if is_good_quality(frame):
                if tag:
                    filename = os.path.join(output_dir, f"img_{saved_count}_{tag}.jpg")
                else:
                    filename = os.path.join(output_dir, f"img_{saved_count}.jpg")

#                 frame = cv2.flip(frame, 0) # no need this time to flip them upside down
                cv2.imwrite(filename, frame)
#                 print(f"Saved {filename}")
                saved_count += 1

        frame_count += 1

    cap.release()
    print(f"Extraction complete. {saved_count} frames saved.")


video_file = "VID_20250725_173235.mp4"
SOURCE = r"C:\Users\hp\tableTop\gs\3dmodeling\data"


full_SOURCE = os.path.join(SOURCE, "2dcarm")
output_folder = r"C:\Users\hp\tableTop\gs\3dmodeling\data\2dcarm\extracted_frames_VID_20250725_173235_20\sequential"

get_info(full_SOURCE, video_file)

# Extract frame every 2 seconds
# extract_frames(video_file, output_folder, interval_sec=20)

# Or extract every 30 frames
interval_frame = 15
extract_frames(full_SOURCE, video_file, output_folder, interval_frame=interval_frame)
While the video is recorded at 30 fps, meaning even a short video contains thousands of images, my laptop lacks the necessary hardware to handle the processing workload for such a large number of images, as this volume overwhelms its limits. After some experimentation, I found it acceptable to use only one out of every 15-20 frames. The downside of this sparse sampling is discussed later in the results section.
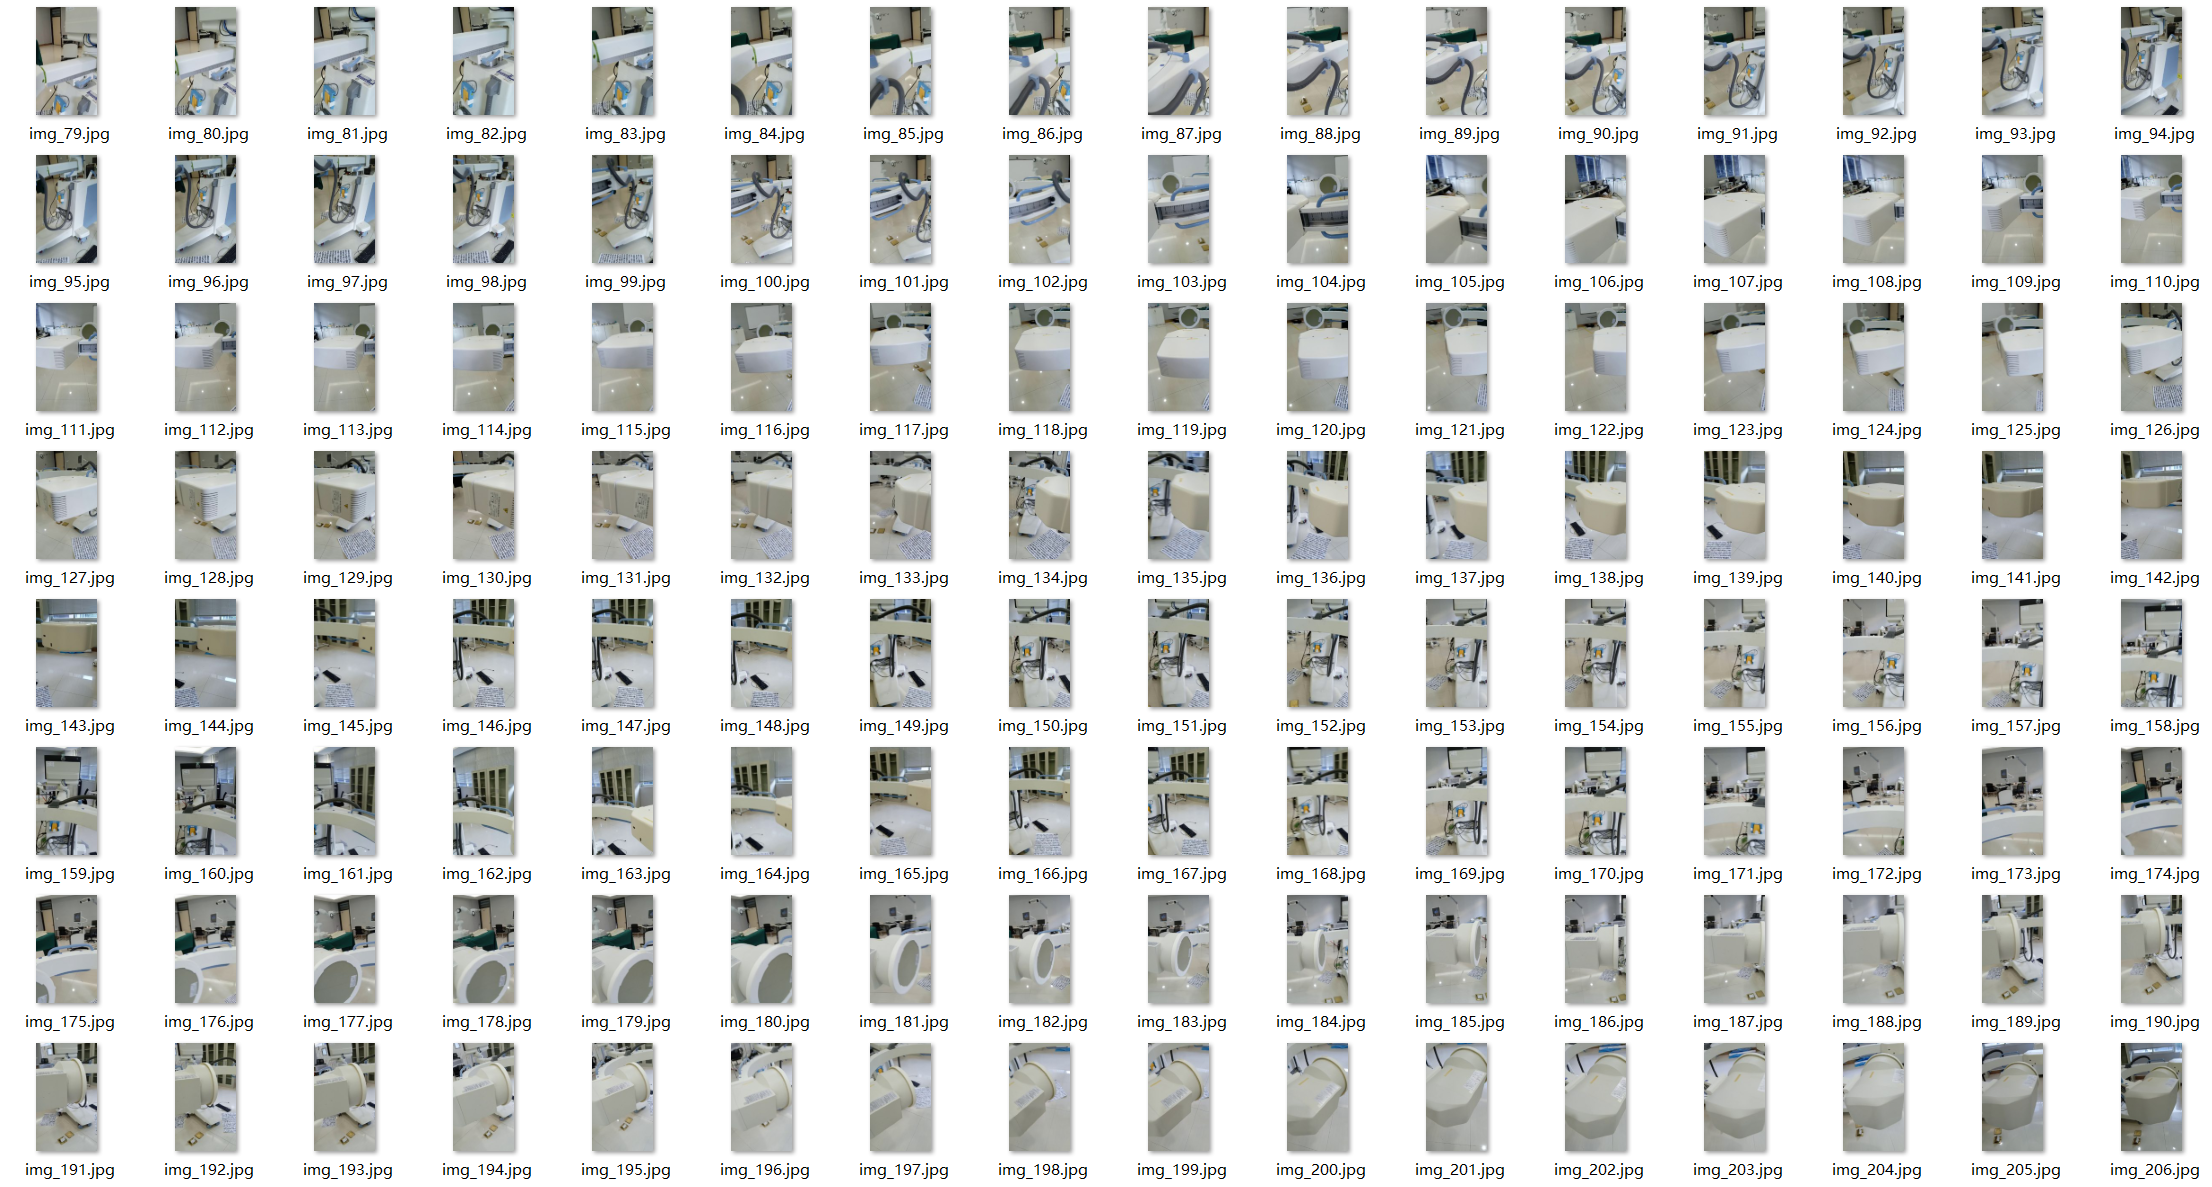
Such a simplistic approach to frame extraction relies on one key assumption: the camera moves steadily around the C-arm. I practiced several times to hold my hand steady while filming. I also learned to leave enough space around the C-arm for walking while filming and to avoid stopping at any spot for too long or too briefly.
COLMAP performs Sparse Reconstruction
Step 1: Extract features from images using SIFT.
Step 2: Estimate camera poses and properties.

Step 3: Utilize the signposts strategically placed around the C-arm.
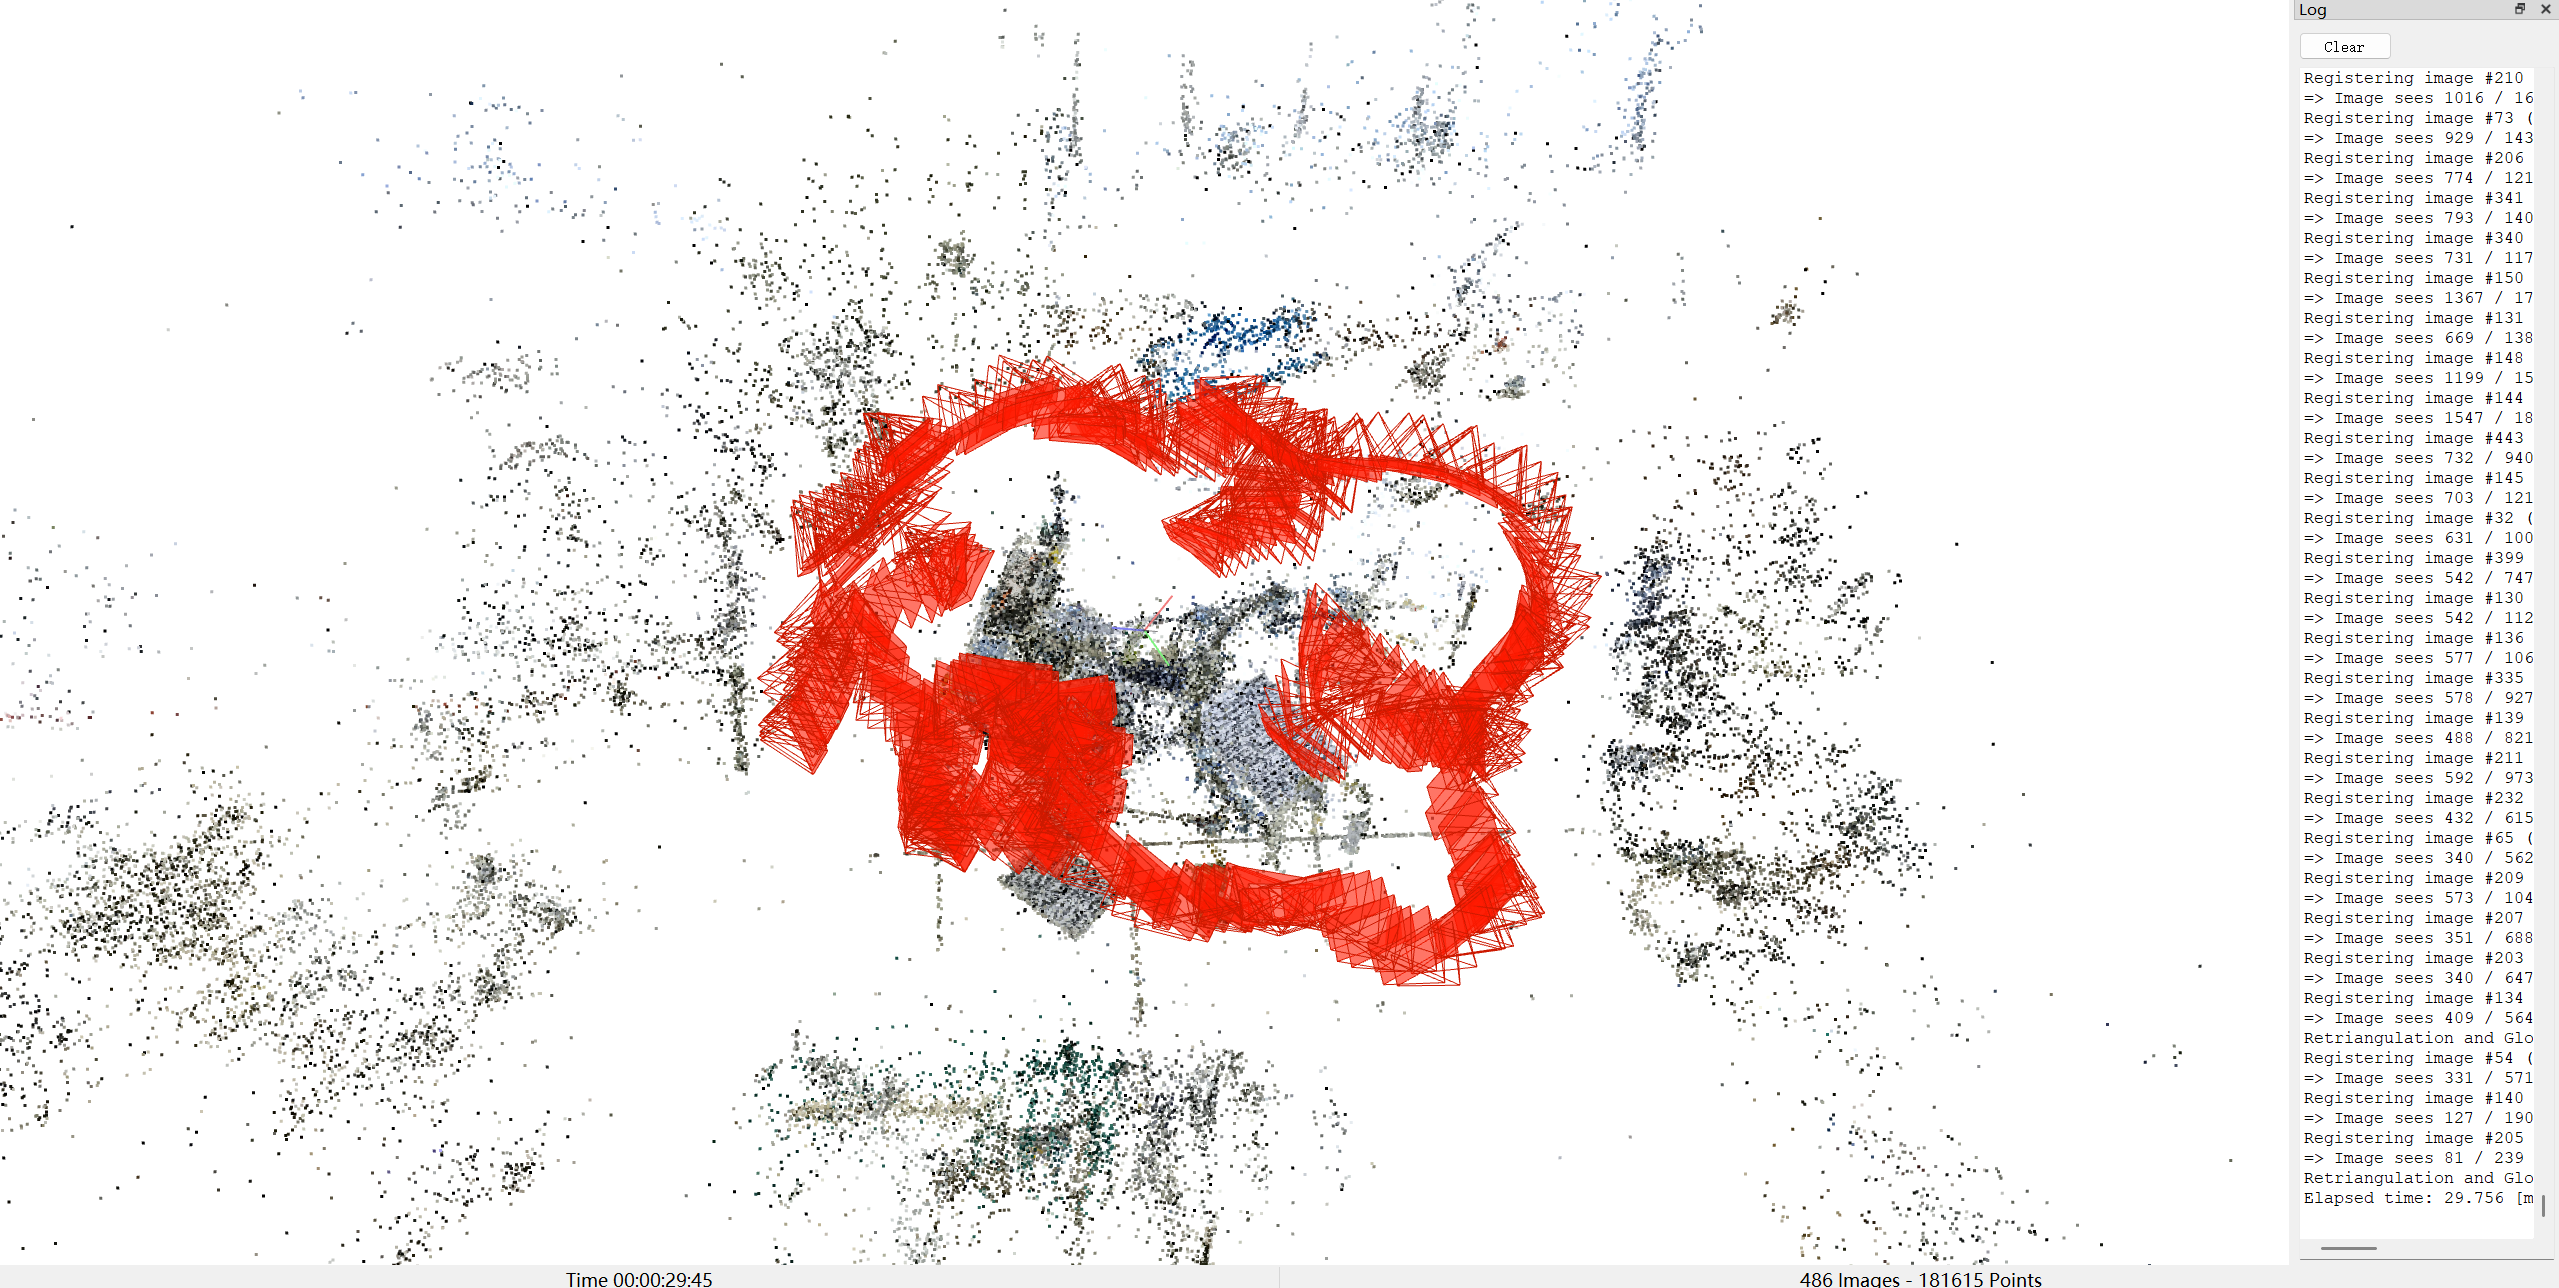
Step 4: Perform image pair matching using an exhaustive approach since the recording forms a loop around the C-arm.
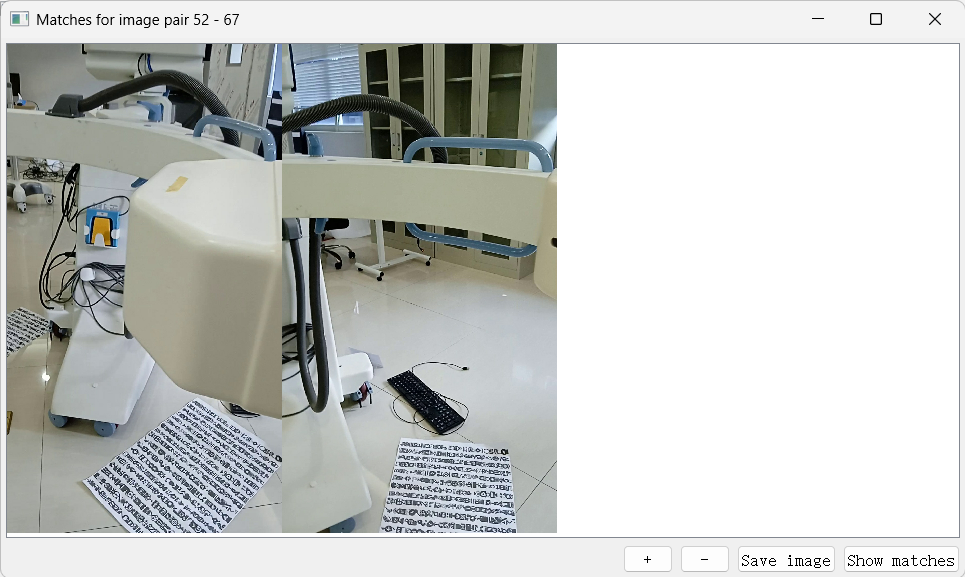
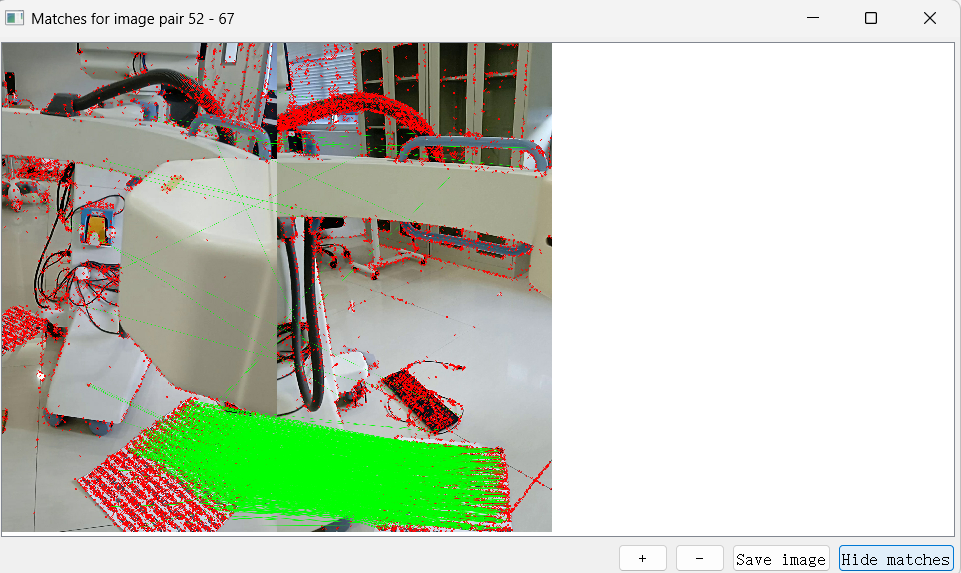
The red dots with a green straight line to denote their direction connection are numerous or abundant for all the signposts I deliberately put down on the floor next to the machine. Super helpful for matching images.
Step 5: Conduct sparse reconstruction.
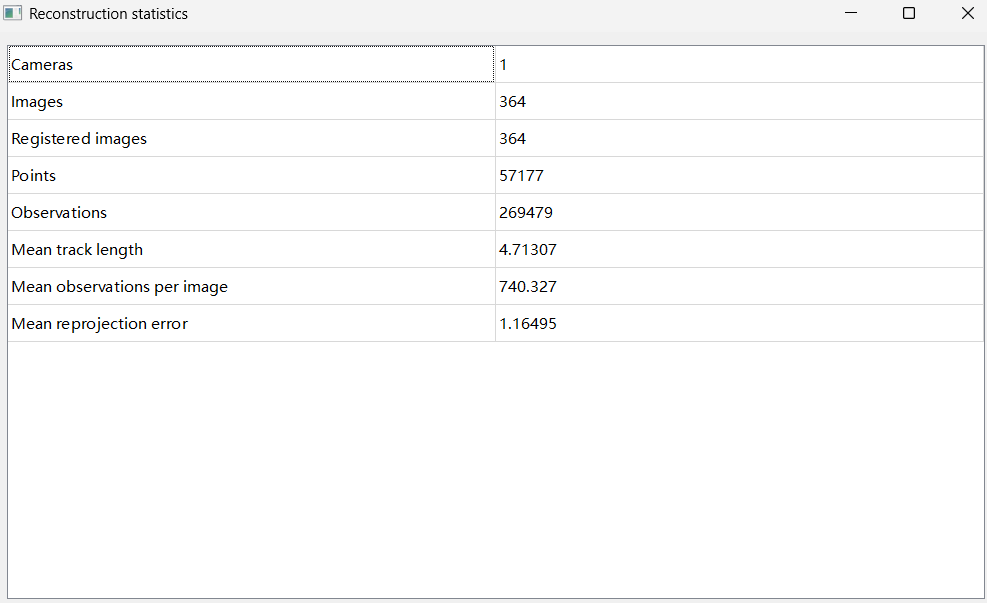
Step 6: Note that the reconstruction quality need not be perfect—“high” quality is sufficient—and it is not necessary to use all images.
Step 7. Review reconstruction results and errors

Step 8: Export models; if distortion is present, undistort images before export. For example, if the camera were not a pinhole but a fisheye type, COLMAP can undistort fisheye images to pinhole-like images for sparse reconstruction. 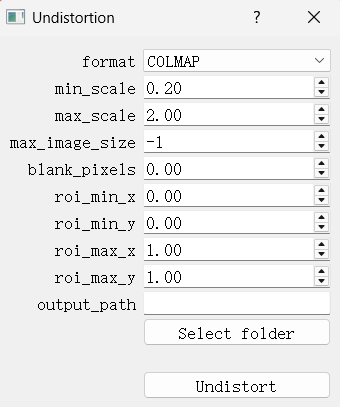
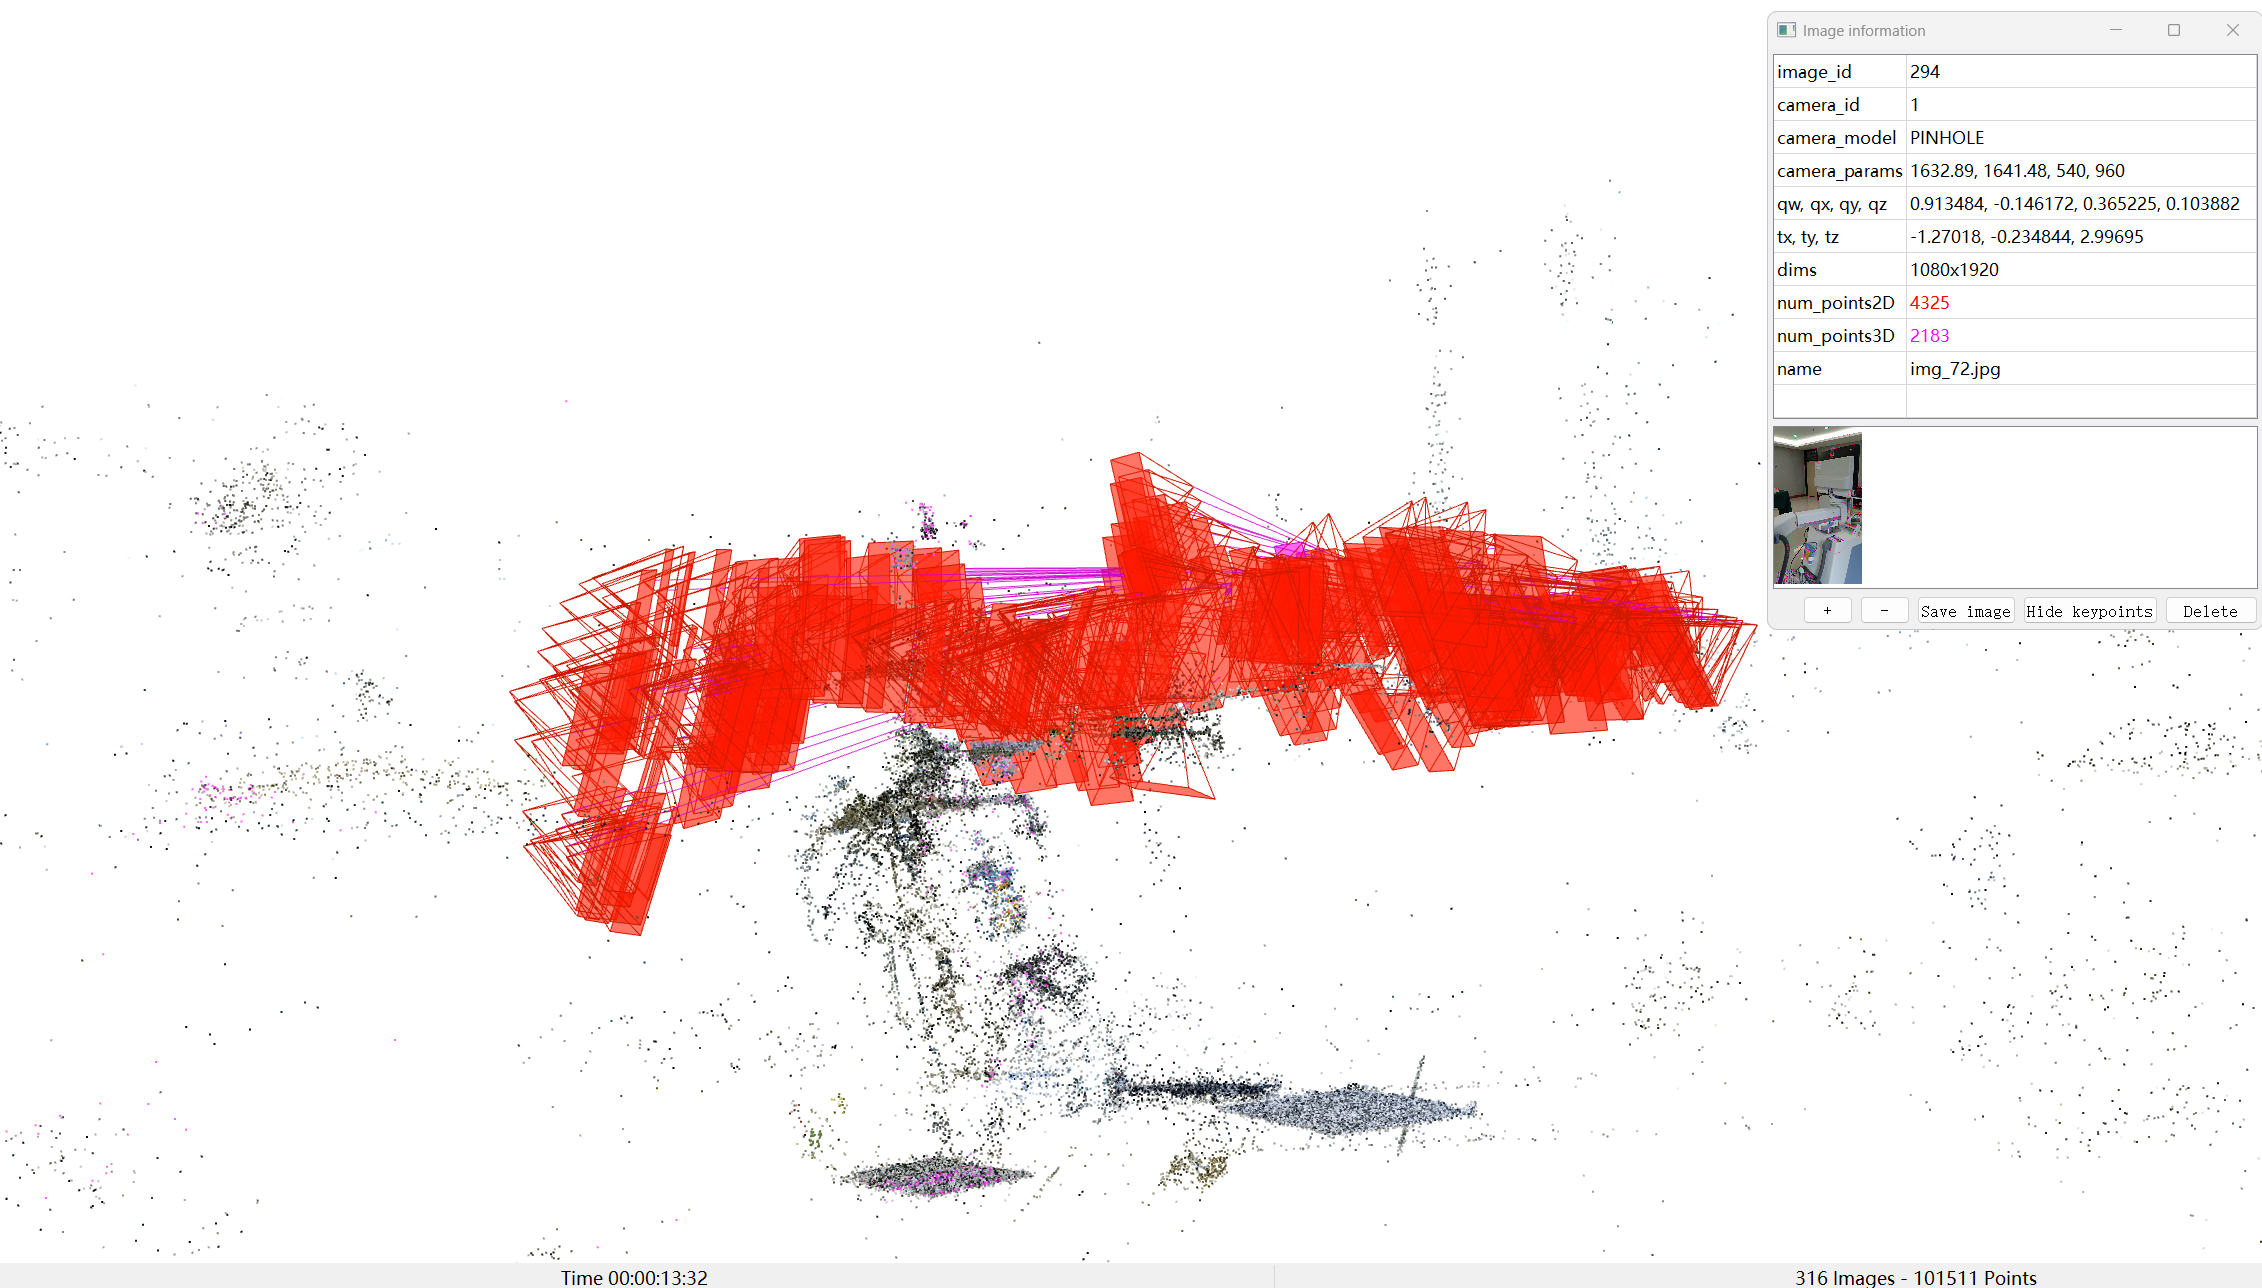
The reconstruction quality varies: a good reconstruction shows a red camera track that closely follows the path around the C-arm, providing a holistic view. Since no absolute ground truth exists for the smartphone camera poses, the alignment must be assessed subjectively by comparing the video filming with COLMAP’s estimates.
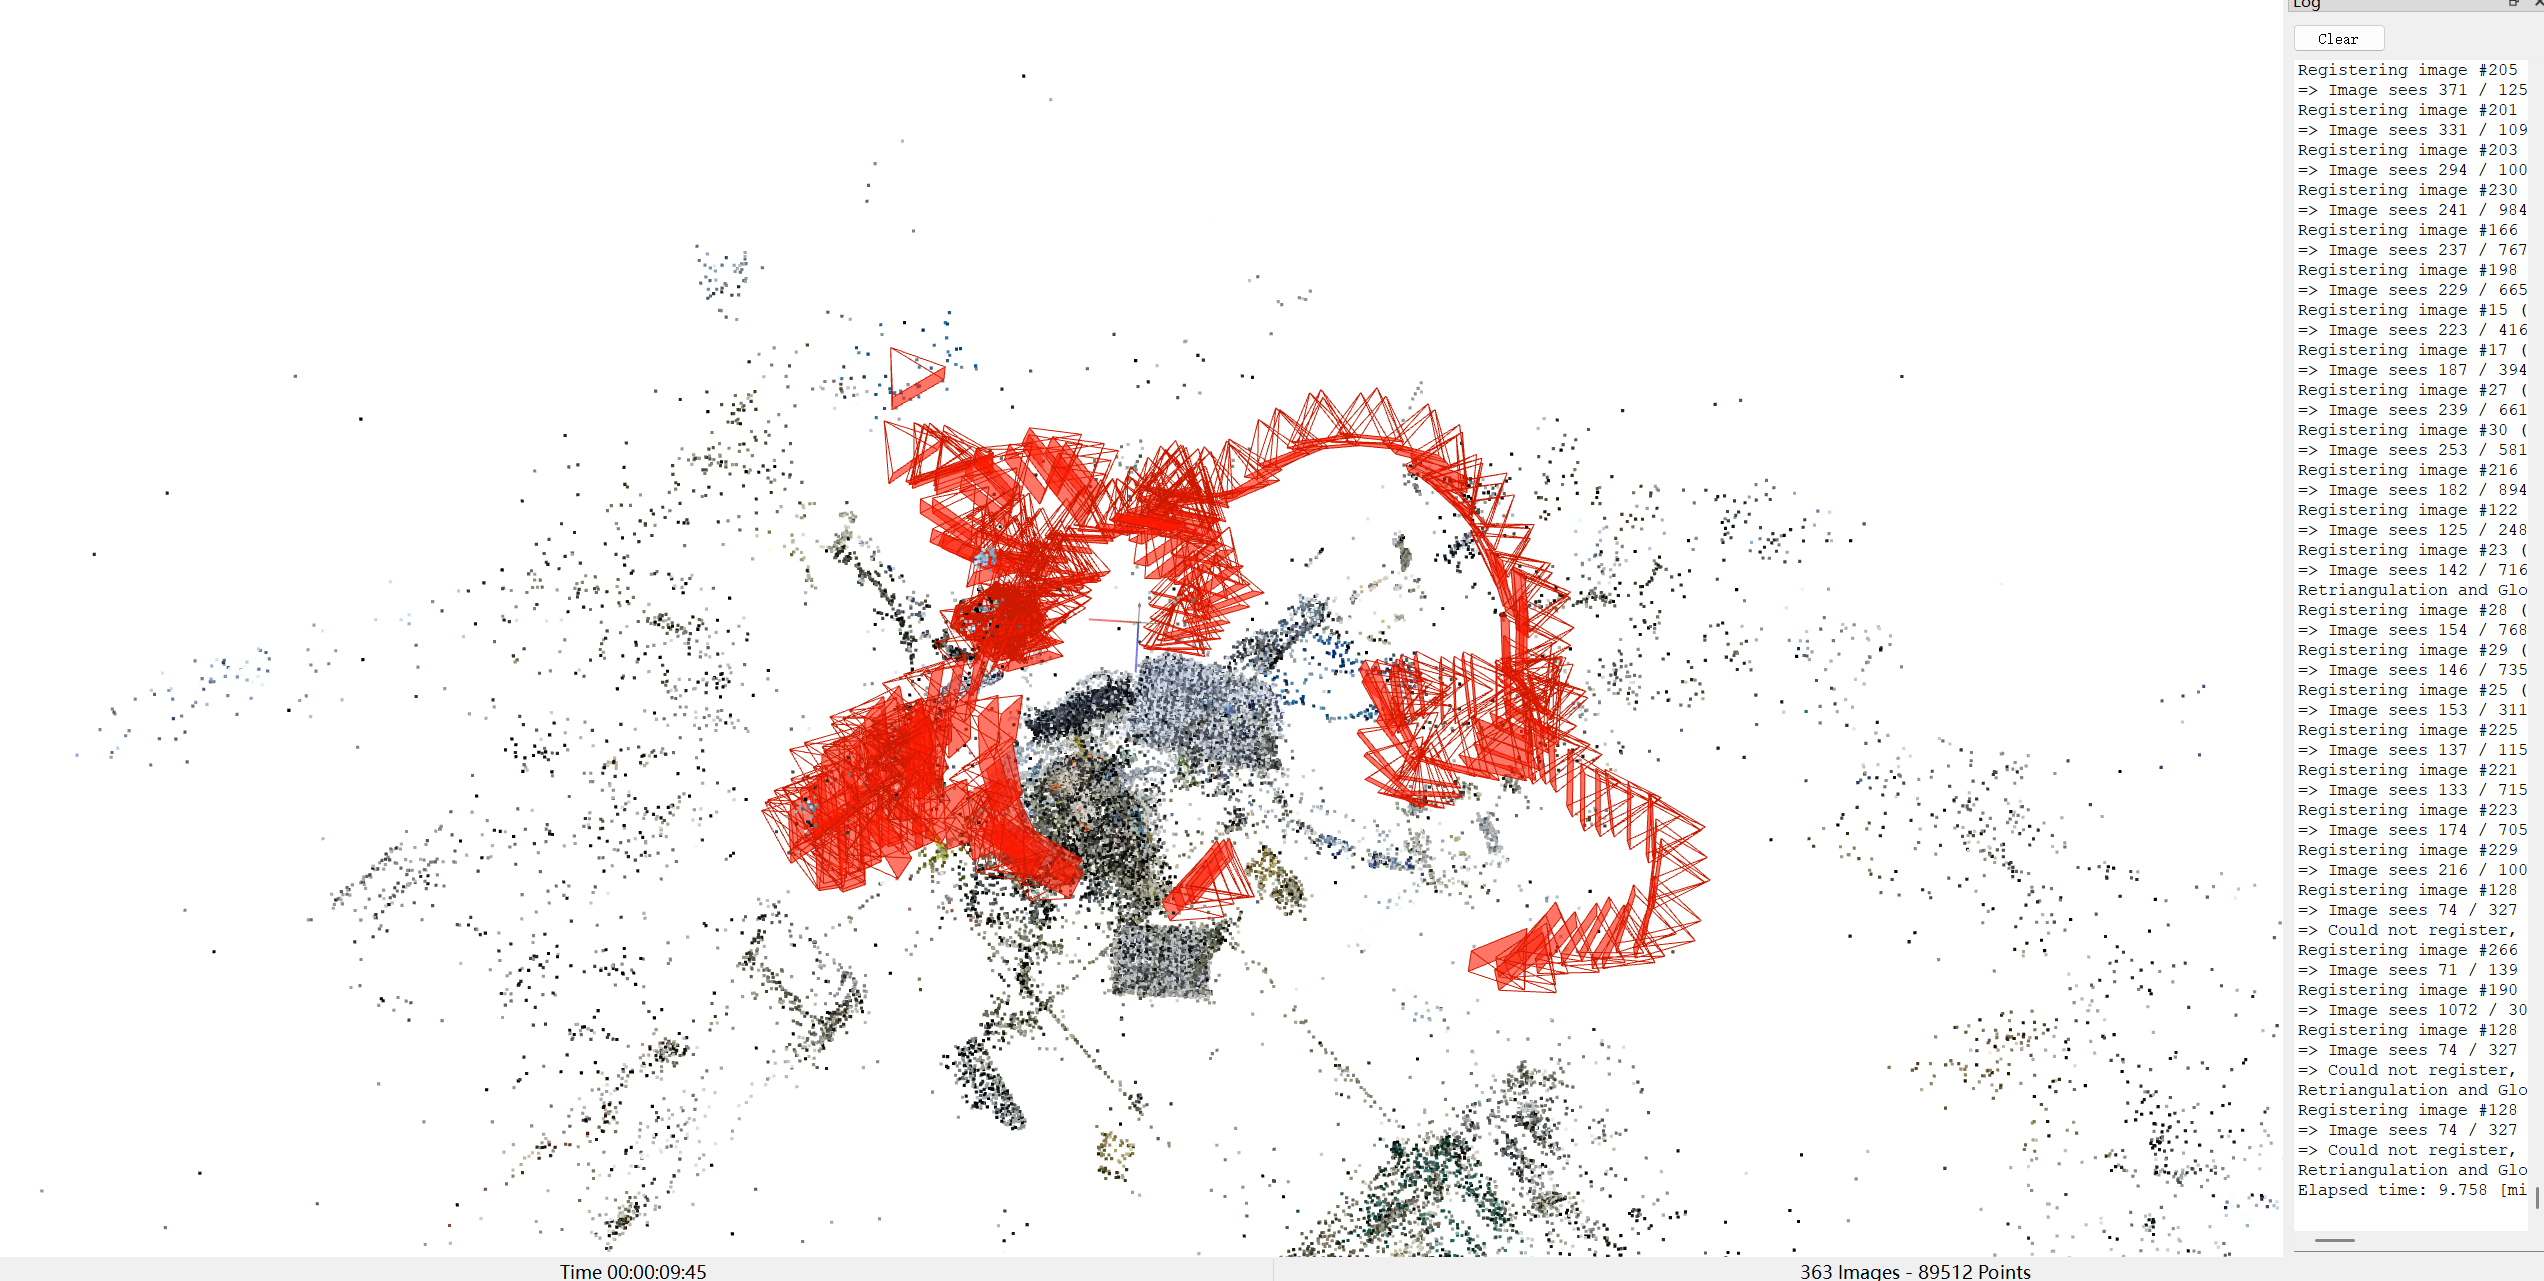
Conversely, a poor reconstruction is evident when the camera track breaks off, and many cameras are inaccurately clustered, pointing in wrong directions. Such misalignment indicates incorrect camera positioning, which can severely impact subsequent processing. Results of Gaussian Splatting on both good and poor reconstructions will reveal stark contrasts.
Vertical camera frames vs horizontal camera frames
Experience indicates that vertical frames do not increase reprojection errors in sparse scene reconstruction, but many frames are dropped because they cannot be fitted with the rest. Conversely, horizontal frames fit more easily with similar reprojection errors and offer many more observations per image.
However, Gaussian Splatting is quite robust. Despite slightly higher errors and fewer images fitted into the scene, the final quality remains decent, as will be discussed later. Following up next is Gaussian Splatting - Gaussian Splatting