
Application to other domain in Computer Vision
The mesh representation is highly versatile and can be manipulated across various applications such as Blender and Unity. However, what determines the mesh quality and the fine, intricate details of the C-arm machine remains unclear to me. To investigate, I varied the raw image resolution during the training of Gaussian Splatting to see if changes in image plane resolution affect the level of detail in the mesh.
Since lower-resolution images provide fewer details—averaging more color and light information over a larger grid area—the Gaussian splats also reflect this loss of information. The figures below illustrate this behavior clearly.
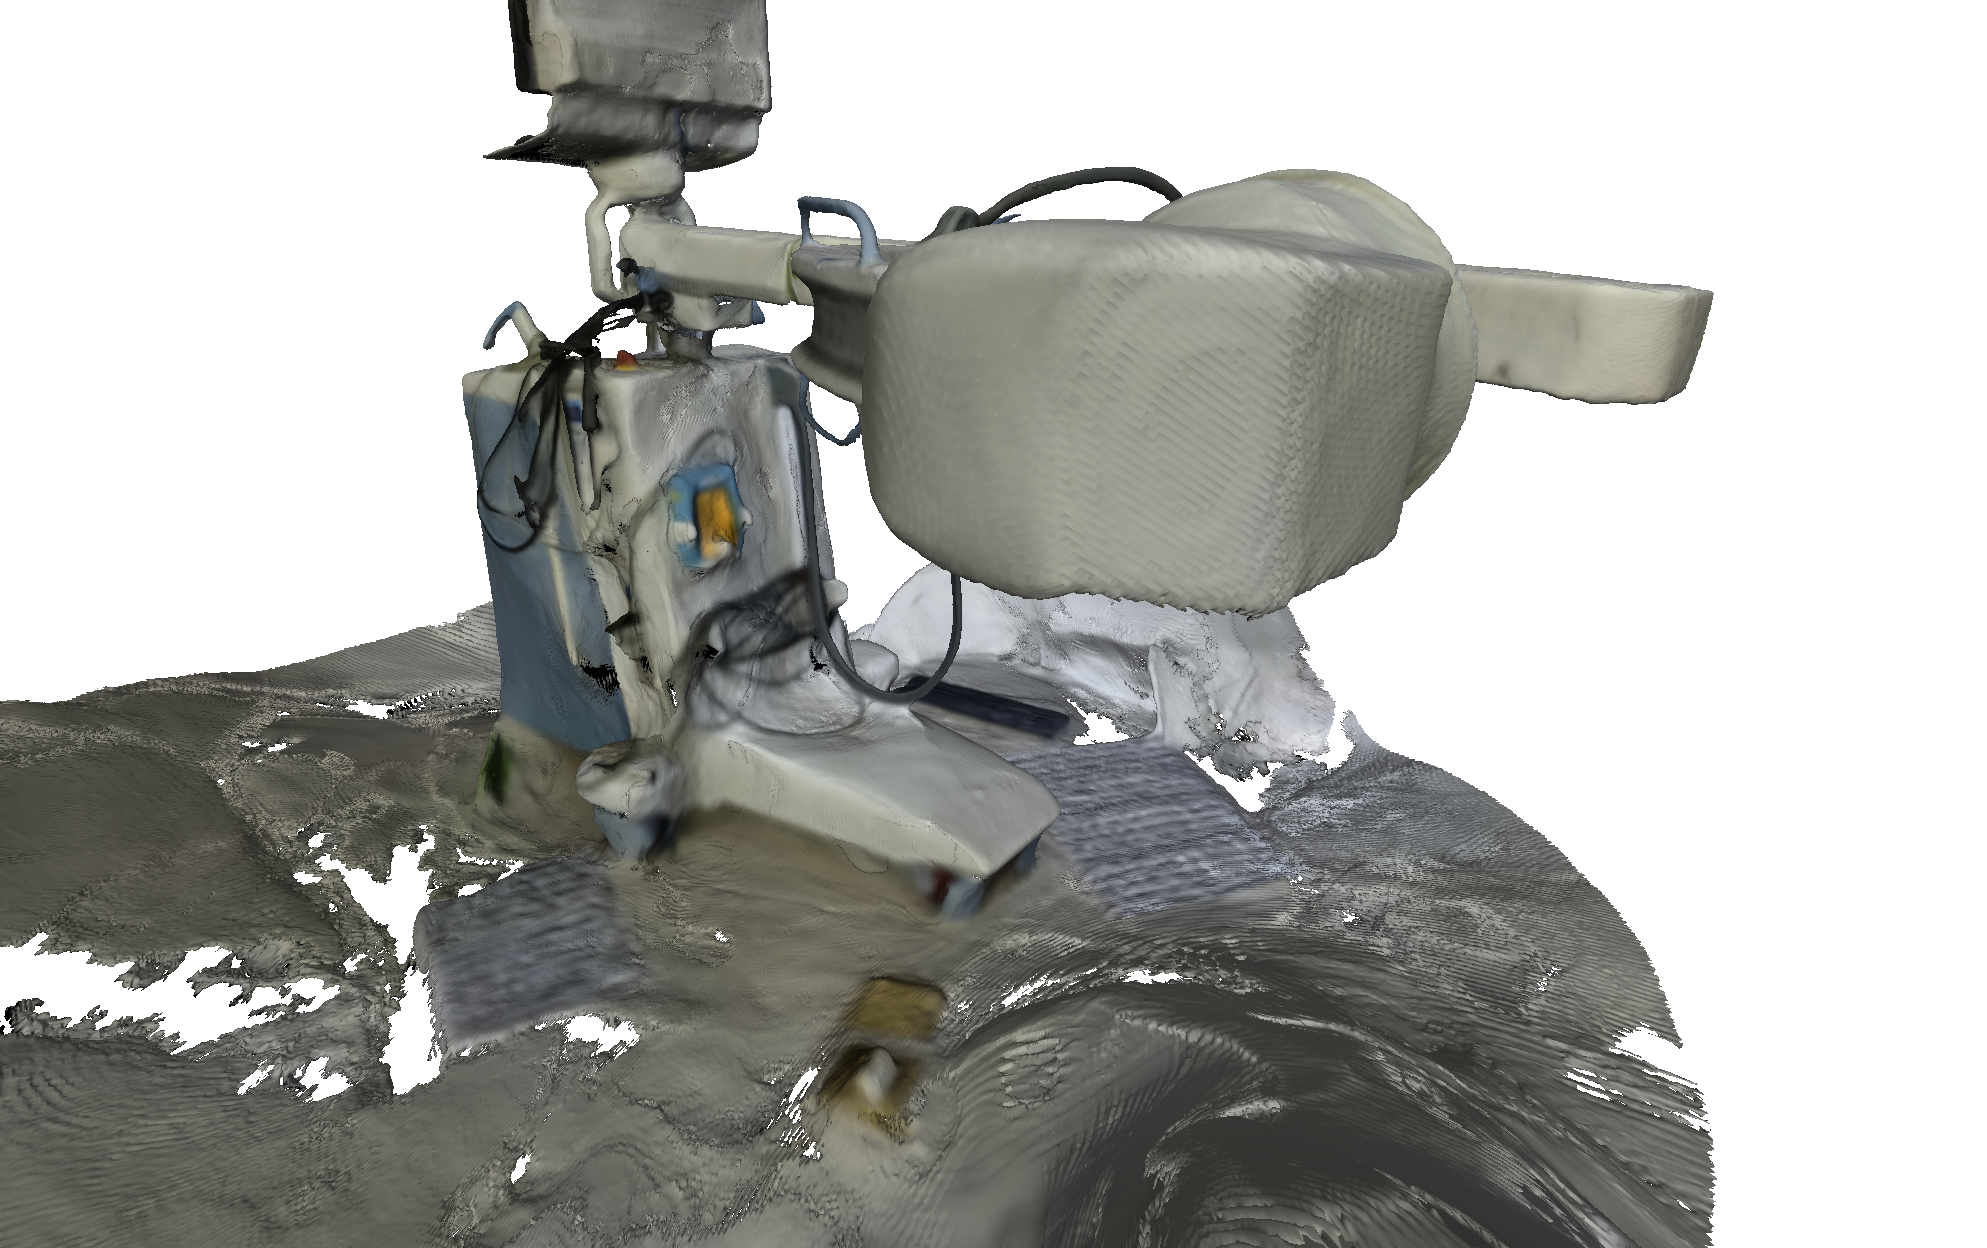
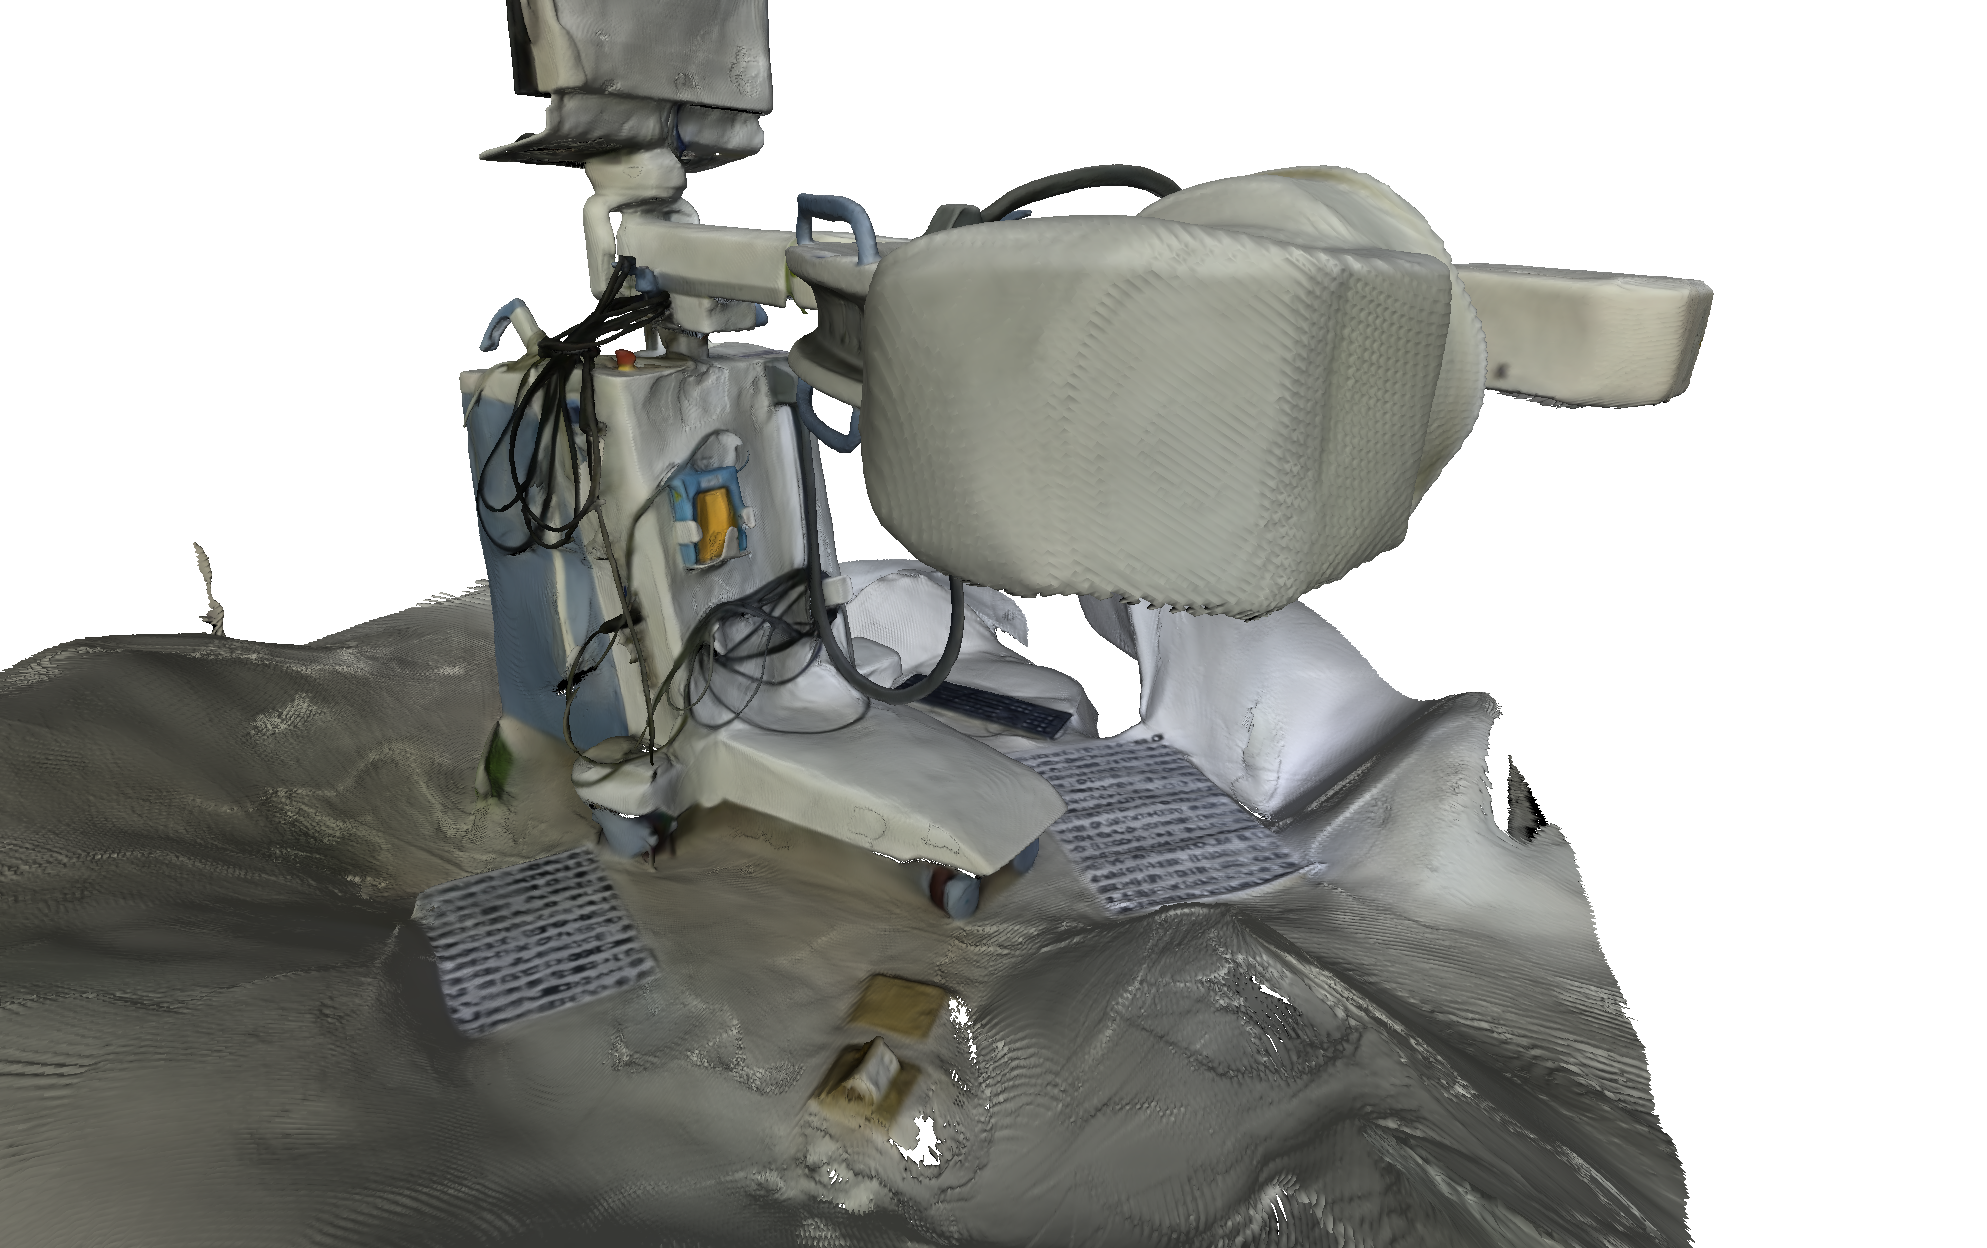
The image on the left shows a mesh trained with low resolution images (240x134); the right shows a mesh trained with high resolution images (1920x1080)
The image on the left shows a mesh trained with low-resolution images (240x134), while the one on the right shows a mesh trained with high-resolution images (1920x1080). By comparing and contrasting these two images (move the slider in the center), we can see that features such as the keyboard, the calibration sheet, the foot pedal of the C-arm, and the sharp edges of various components are richer and more distinctive in the high-resolution mesh.
Tips: The Python Open3D (O3D) package offers several useful functions for mesh post-processing. Its visualization features are particularly powerful because they leverage GPU acceleration. Since NumPy functions are highly optimized and the mesh contains many vertices and faces, I avoid Python for-loops and instead rely on NumPy arrays, advanced indexing, and boolean operations to process the mesh as efficiently as possible.
import open3d as o3d
import numpy as np
import os
from tqdm import tqdm
def crop_mesh_with_radius(mesh_path, output_path, radius):
    mesh = o3d.io.read_triangle_mesh(mesh_path)
    vertices = np.asarray(mesh.vertices)
    print("reading mesh from", mesh_path)
    print(f"Original mesh has {len(vertices)} vertices and {len(mesh.triangles)} triangles.")

    # Calculate center of mass
    center = vertices.mean(axis=0)
    print(f"Center of mass: {center}")

    # Plot original mesh
    # print("Plotting original mesh...")
    # o3d.visualization.draw_geometries([mesh], window_name="Original Mesh")

    # Distance from center
    dists = np.linalg.norm(vertices - center, axis=1)
    kept_indices = np.where(dists <= radius)[0]
    print(kept_indices, type(kept_indices), kept_indices.shape)
    # index_map = {int(old_idx): new_idx for new_idx, old_idx in enumerate(kept_indices)}
    new_vertices = vertices[kept_indices]

    vertex_mask = np.zeros(vertices.shape[0], dtype=bool)
    vertex_mask[kept_indices] = True

    # triangles: (n_triangles, 3)
    triangles = np.asarray(mesh.triangles)
    assert len(triangles.shape) ==2 and triangles.shape[1] == 3
    # Create a mask for triangles where all vertices are kept
    triangle_mask = vertex_mask[triangles].all(axis=1)
    filtered_triangles = triangles[triangle_mask]

    # Mapping from old to new vertex indices
    # index_map = {old_idx: new_idx for new_idx, old_idx in enumerate(kept_indices)}

    # kept_indices: (n_kept,), triangles: (n_triangle, 3)
    remap_array = np.full(vertices.shape[0], -1, dtype=int)
    remap_array[kept_indices] = np.arange(len(kept_indices))
    filtered_triangles_mapped = remap_array[filtered_triangles]  # (n_kept_triangle, 3)


    # filtered_triangles_mapped = np.vectorize(index_map.get)(filtered_triangles)

    print(filtered_triangles_mapped, type(filtered_triangles_mapped), filtered_triangles_mapped.shape)


    # filtered_triangles = []
    # for tri in tqdm(triangles):
    #     if set(tri).issubset(index_map.keys()):
    #         filtered_triangles.append([index_map[v] for v in tri])

    cropped_mesh = o3d.geometry.TriangleMesh(
        o3d.utility.Vector3dVector(new_vertices),
        o3d.utility.Vector3iVector(filtered_triangles_mapped)
    )


    # Transfer vertex colors if they exist
    if len(mesh.vertex_colors) > 0:
        old_vertex_colors = np.asarray(mesh.vertex_colors)
        new_vertex_colors = old_vertex_colors[kept_indices]
        cropped_mesh.vertex_colors = o3d.utility.Vector3dVector(new_vertex_colors)


    # Plot mesh after cropping
    # print("Plotting cropped mesh...")
    # o3d.visualization.draw_geometries([cropped_mesh], window_name="Cropped Mesh")

    o3d.io.write_triangle_mesh(output_path, cropped_mesh)
    print(f"Cropped mesh saved to {output_path}")


def keep_largest_cluster(mesh_path, output_path):
    mesh = o3d.io.read_triangle_mesh(mesh_path)
    print("reading mesh from", mesh_path)
    vertices = np.asarray(mesh.vertices)
    print(f"Original mesh has {len(vertices)} vertices and {len(mesh.triangles)} triangles.")

    with o3d.utility.VerbosityContextManager(o3d.utility.VerbosityLevel.Debug) as cm:
        triangle_clusters, cluster_n_triangles, cluster_area = (
            mesh.cluster_connected_triangles()
        )

        cluster_indices = np.argsort(cluster_n_triangles)[::-1]  # Largest first
        largest_cluster_idx = cluster_indices[0]
        print(f"Largest cluster index: {largest_cluster_idx}, Size: {cluster_n_triangles[largest_cluster_idx]}")

        # Create a mask for triangles belonging to the largest cluster
        triangle_mask = (triangle_clusters == largest_cluster_idx)
        filtered_triangles = np.asarray(mesh.triangles)[triangle_mask]

        # Find unique vertices used in the filtered triangles
        unique_vertex_indices = np.unique(filtered_triangles)
        new_vertices = vertices[unique_vertex_indices]

        # Mapping from old to new vertex indices
        index_map = {old_idx: new_idx for new_idx, old_idx in enumerate(unique_vertex_indices)}
        filtered_triangles_mapped = np.vectorize(index_map.get)(filtered_triangles)

        cropped_mesh = o3d.geometry.TriangleMesh(
            o3d.utility.Vector3dVector(new_vertices),
            o3d.utility.Vector3iVector(filtered_triangles_mapped)
        )

        # Transfer vertex colors if they exist
        if len(mesh.vertex_colors) > 0:
            old_vertex_colors = np.asarray(mesh.vertex_colors)
            new_vertex_colors = old_vertex_colors[unique_vertex_indices]
            cropped_mesh.vertex_colors = o3d.utility.Vector3dVector(new_vertex_colors)


        cropped_mesh.remove_unreferenced_vertices()
        cropped_mesh.remove_degenerate_triangles()

        # Plot mesh after cropping
        # print("Plotting cropped mesh...")
        # o3d.visualization.draw_geometries([cropped_mesh], window_name="Cropped Mesh")

        o3d.io.write_triangle_mesh(output_path, cropped_mesh)
        print(f"Cropped mesh saved to {output_path}")


root_dir =r"C:\Users\hp\tableTop\gs\2d-gaussian-splatting\outputs\lifesync\VID_20250725_173235_20_93"
for mesh_dir in [1,2,4,8]:
    mesh_dir = os.path.join(root_dir, "15_" + str(mesh_dir), "train", "ours_93000")
    crop_mesh_with_radius(
        os.path.join(mesh_dir, "fuse_unbounded.ply"),
        os.path.join(mesh_dir, "fuse_cropped.ply"),
        radius=4.5
    )

    keep_largest_cluster(
        os.path.join(mesh_dir, "fuse_cropped.ply"),
        os.path.join(mesh_dir, "fuse_cropped_largest.ply")
    )

    # break
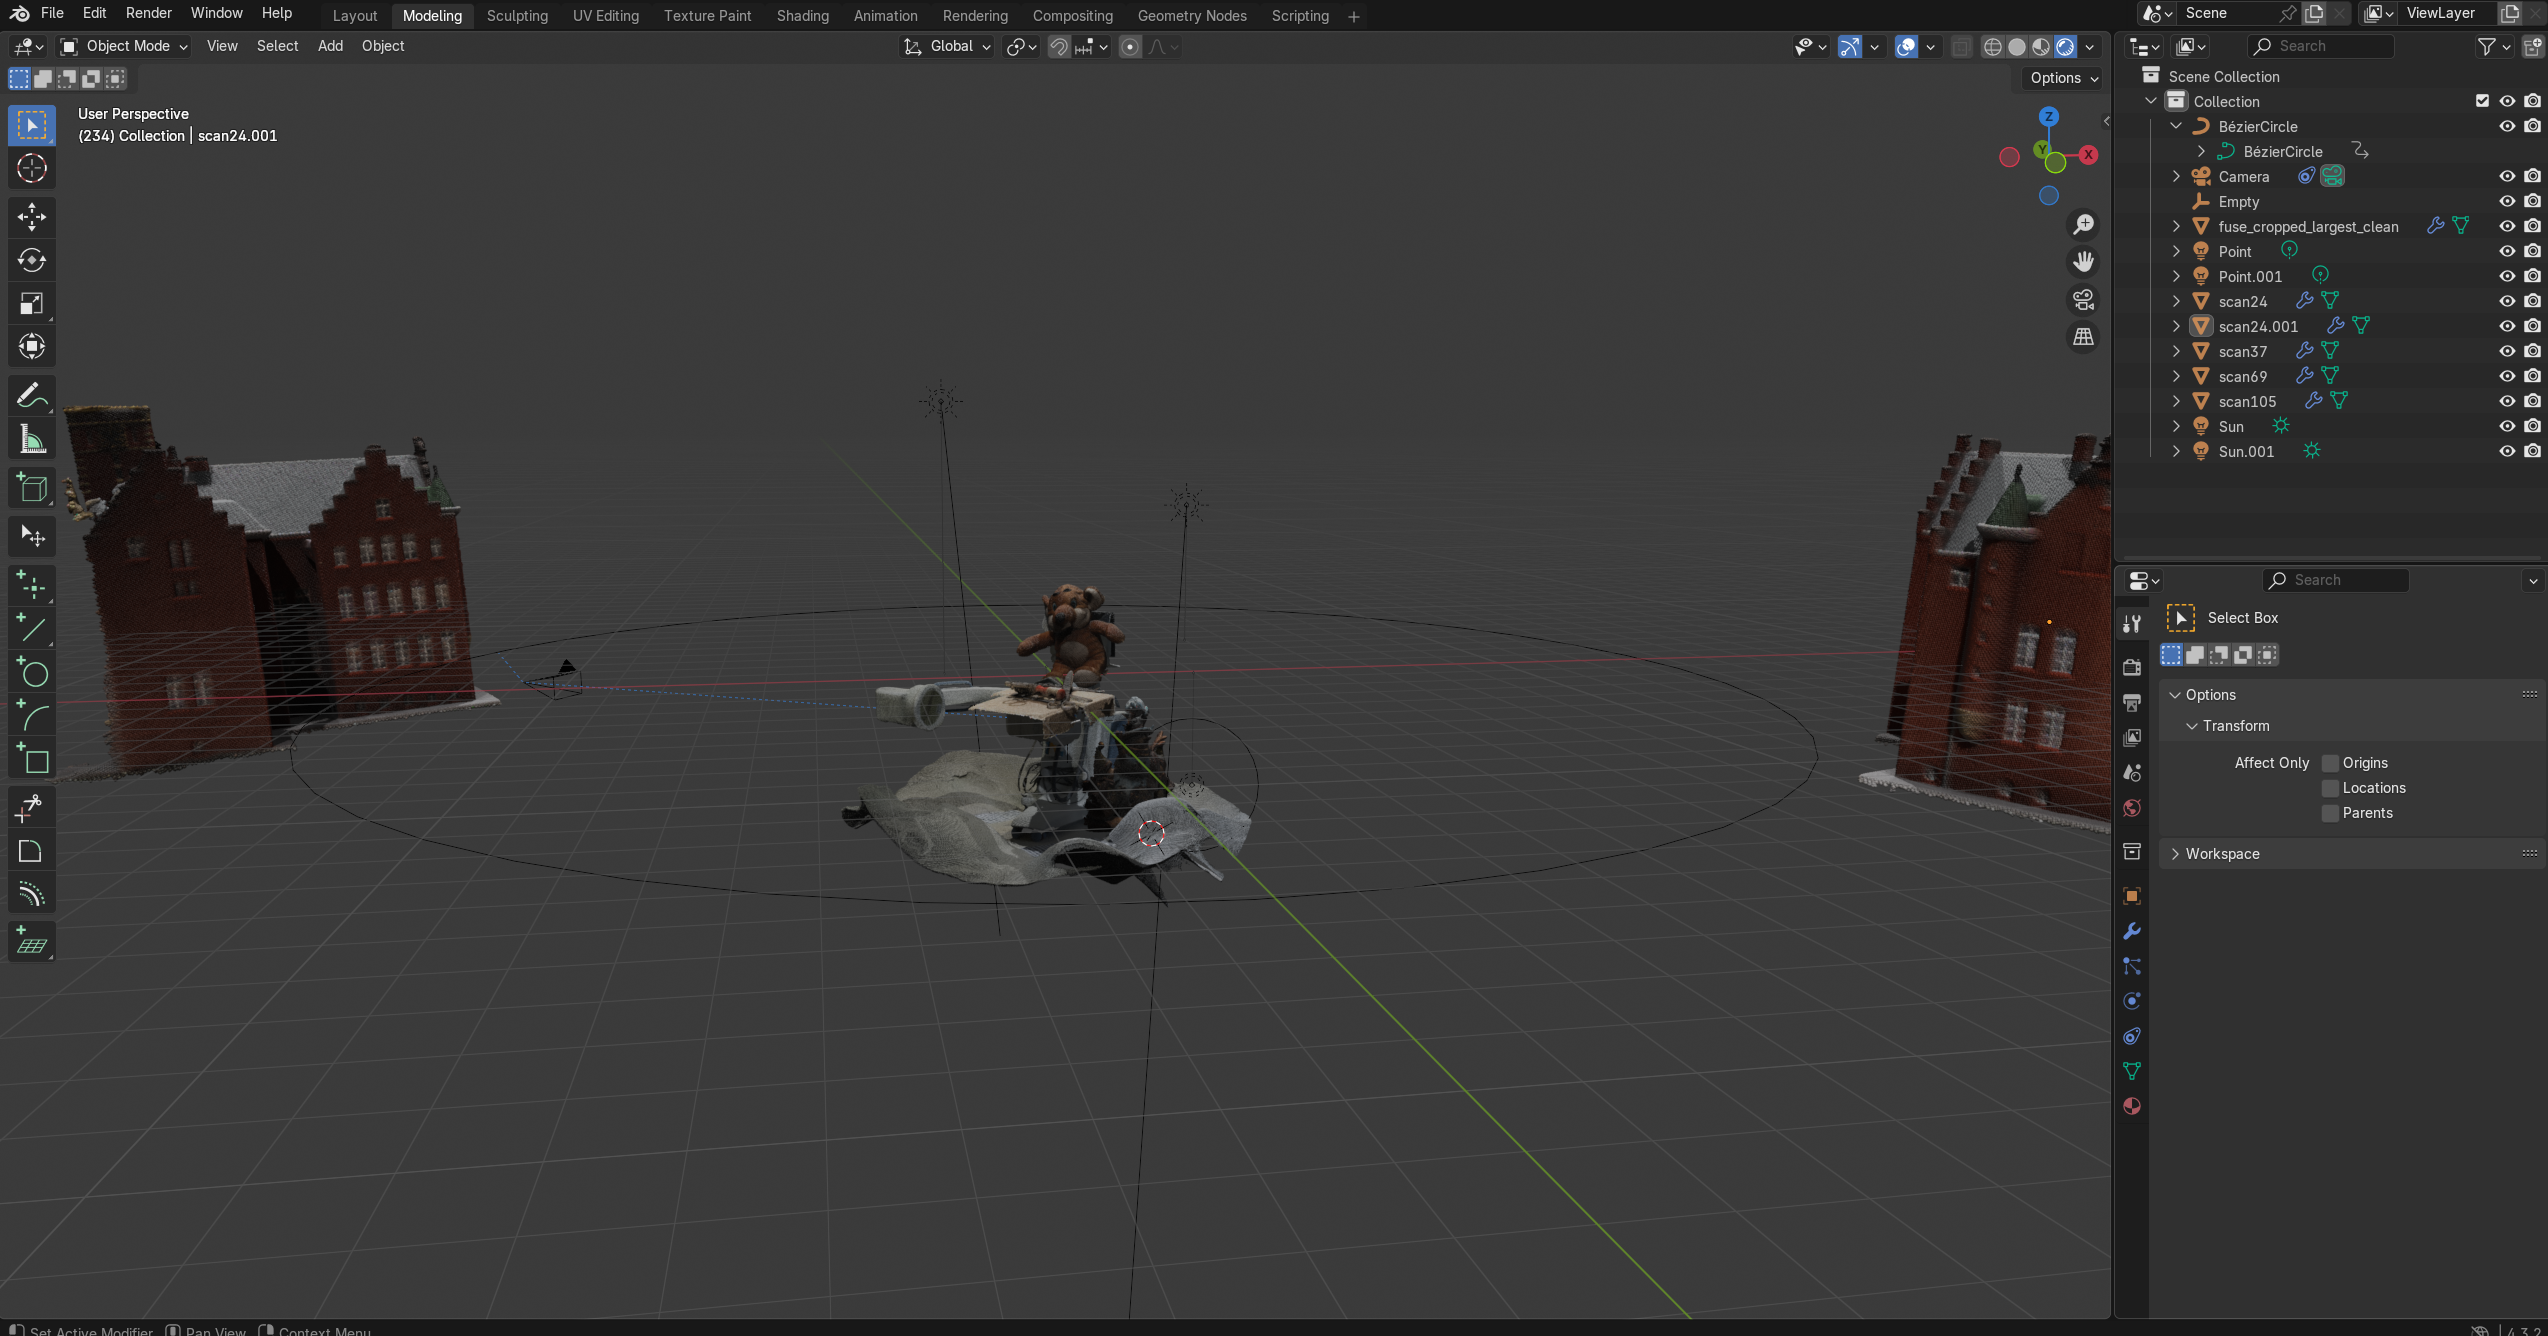
Blender
After importing the mesh as a PLY file, Blender allows for extensive editing capabilities. To showcase a compelling lighting effect, I positioned sun light and point light sources near the C-arm model and rendered a video in Blender. The camera was set to follow a circular trajectory, smoothly tracking the target object.
Note: Be sure to enable the Geometry Editor and Shader features.
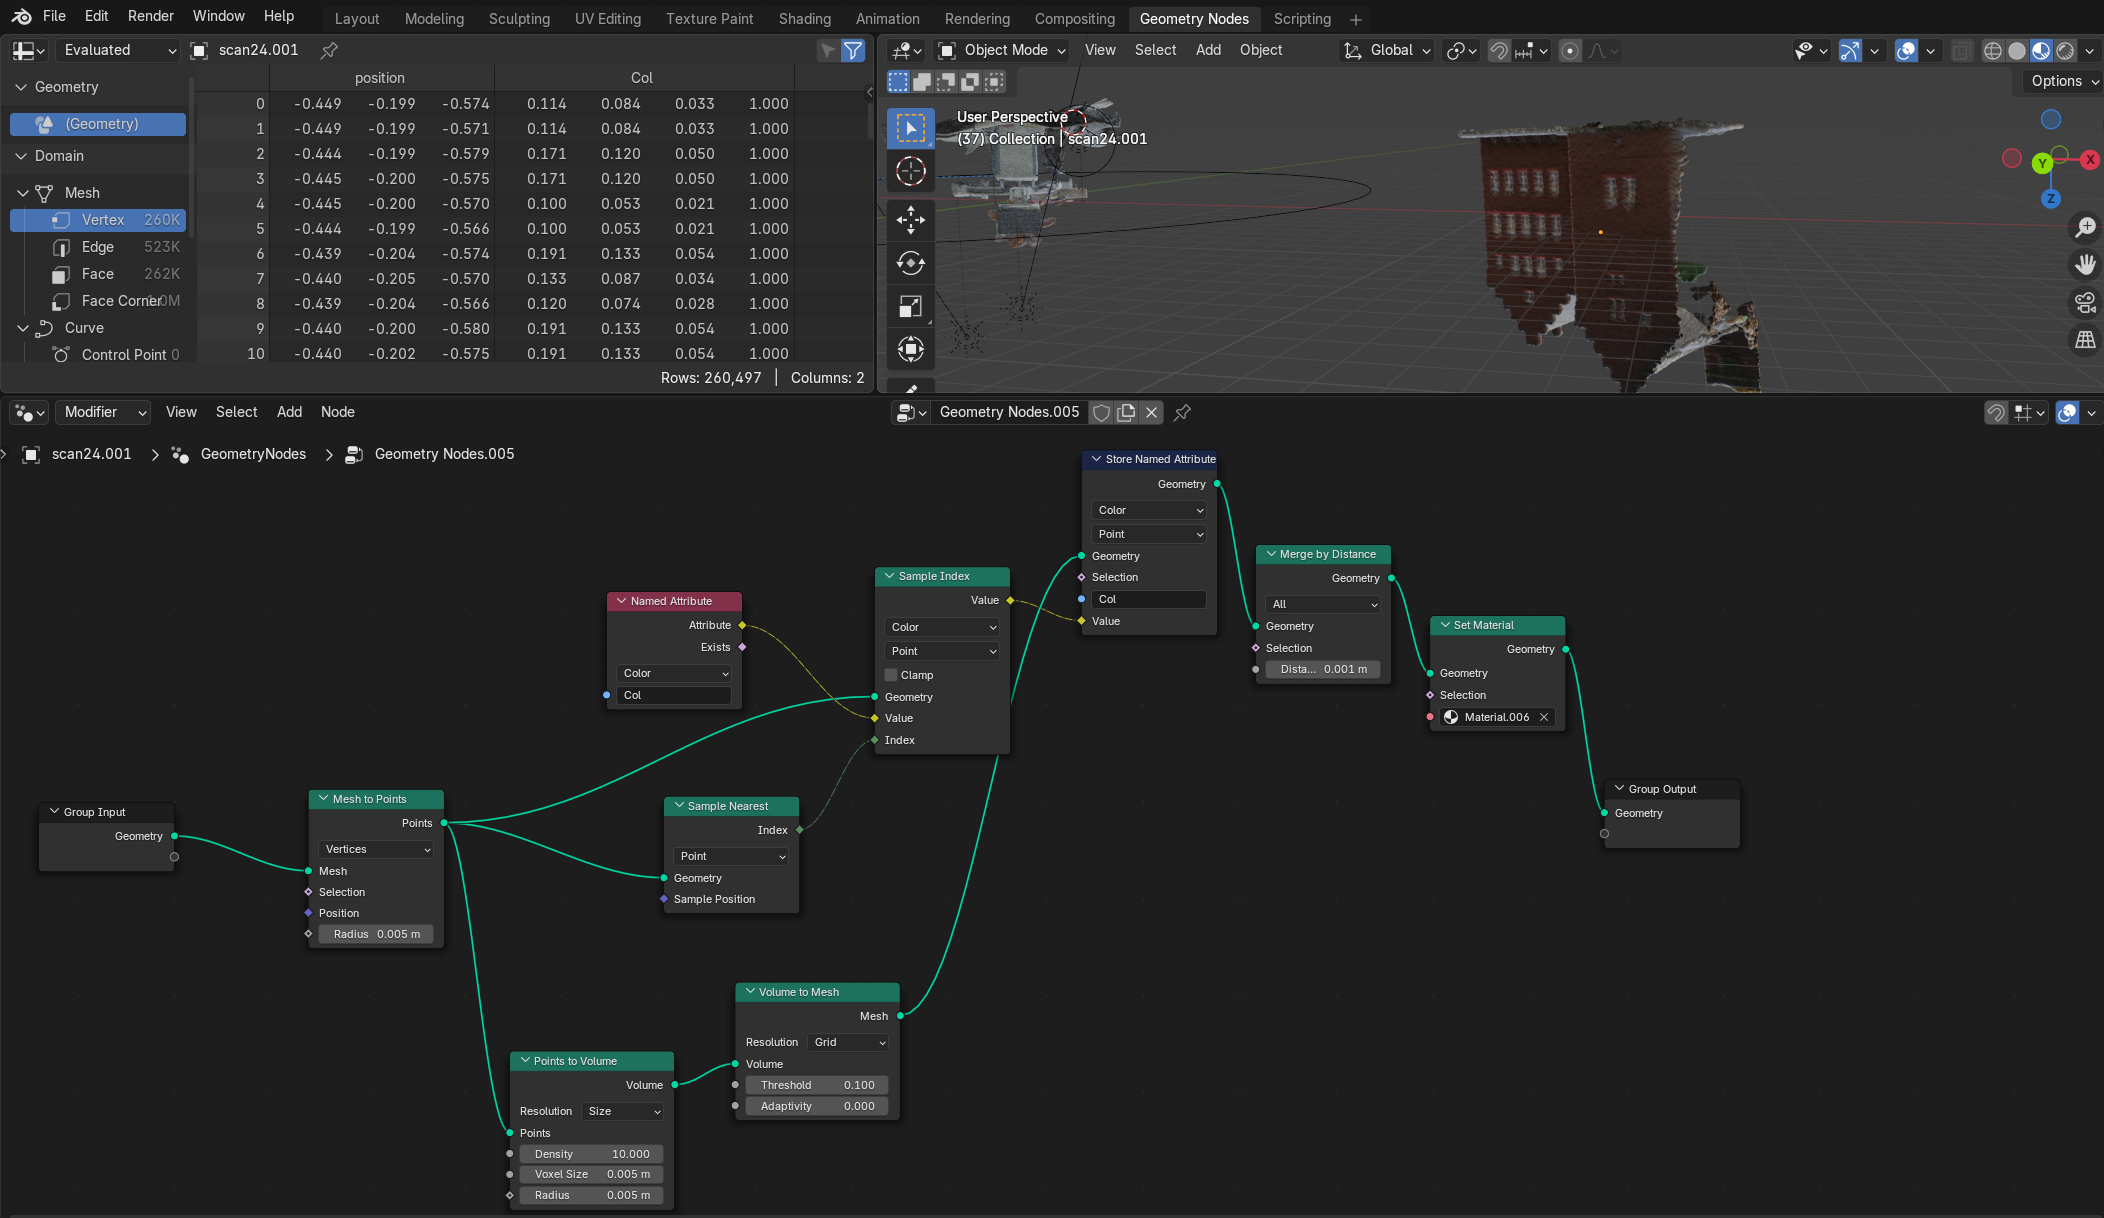
Switch on Geometry editor to convert the point cloud to point representation.

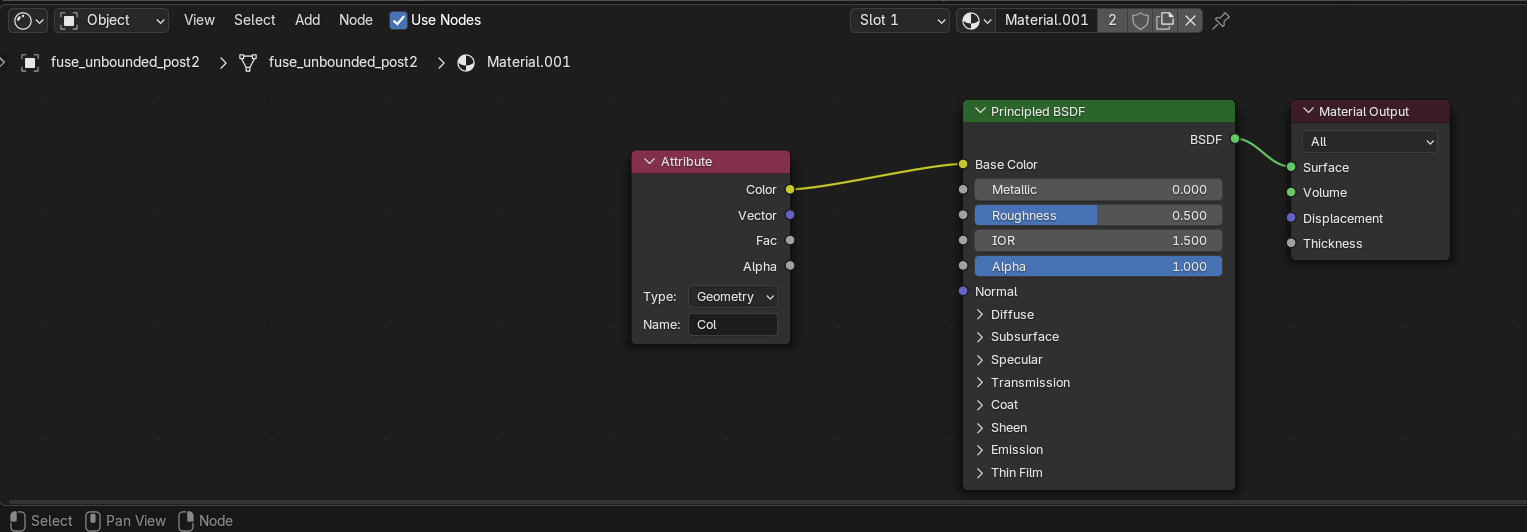
Assign the color stored as Col (blender is case sensitive) as the color. this color can be saved as a material that is assigned to the geometry
Convert point representation to meshes so that the meshes can later be exported to fbx or other preferred file formats.
For convenience, Cycles rendering was disabled, and EEVEE was used instead. While the quality is comparable, EEVEE offers significantly faster rendering times.
Mobile C-arm Machine Model created by 2D Gaussian Splatting in Blender with lights rendered by EEVEE
After further tuning and adjustments, the resulting video better showcases the high-resolution quality of the mesh. Newton famously said he was “standing on the shoulders of giants,” and inspired by that spirit, I integrated output meshes generated by the original 2D Gaussian Splatting research team onto the 2D C-arm model. This highlights how digital assets can be recombined and repurposed in new and creative ways.
However, a useful tip is to convert the point cloud to a mesh as the mesh looks more concrete. Below is the procedure to accomplish this with this (DTU) dataset.
High Quality and Resolution 2D Gaussian Splatting 2D C-arm Machine in ML Orientation
High Quality and Resolution 2D Gaussian Splatting 2D C-arm Machine and DTU Meshes in Blender
Unity
Unity is a powerful and widely-used game engine that enables designers to create interactive 2D and 3D experiences. A natural question arises: can our mesh be used as an asset in Unity?
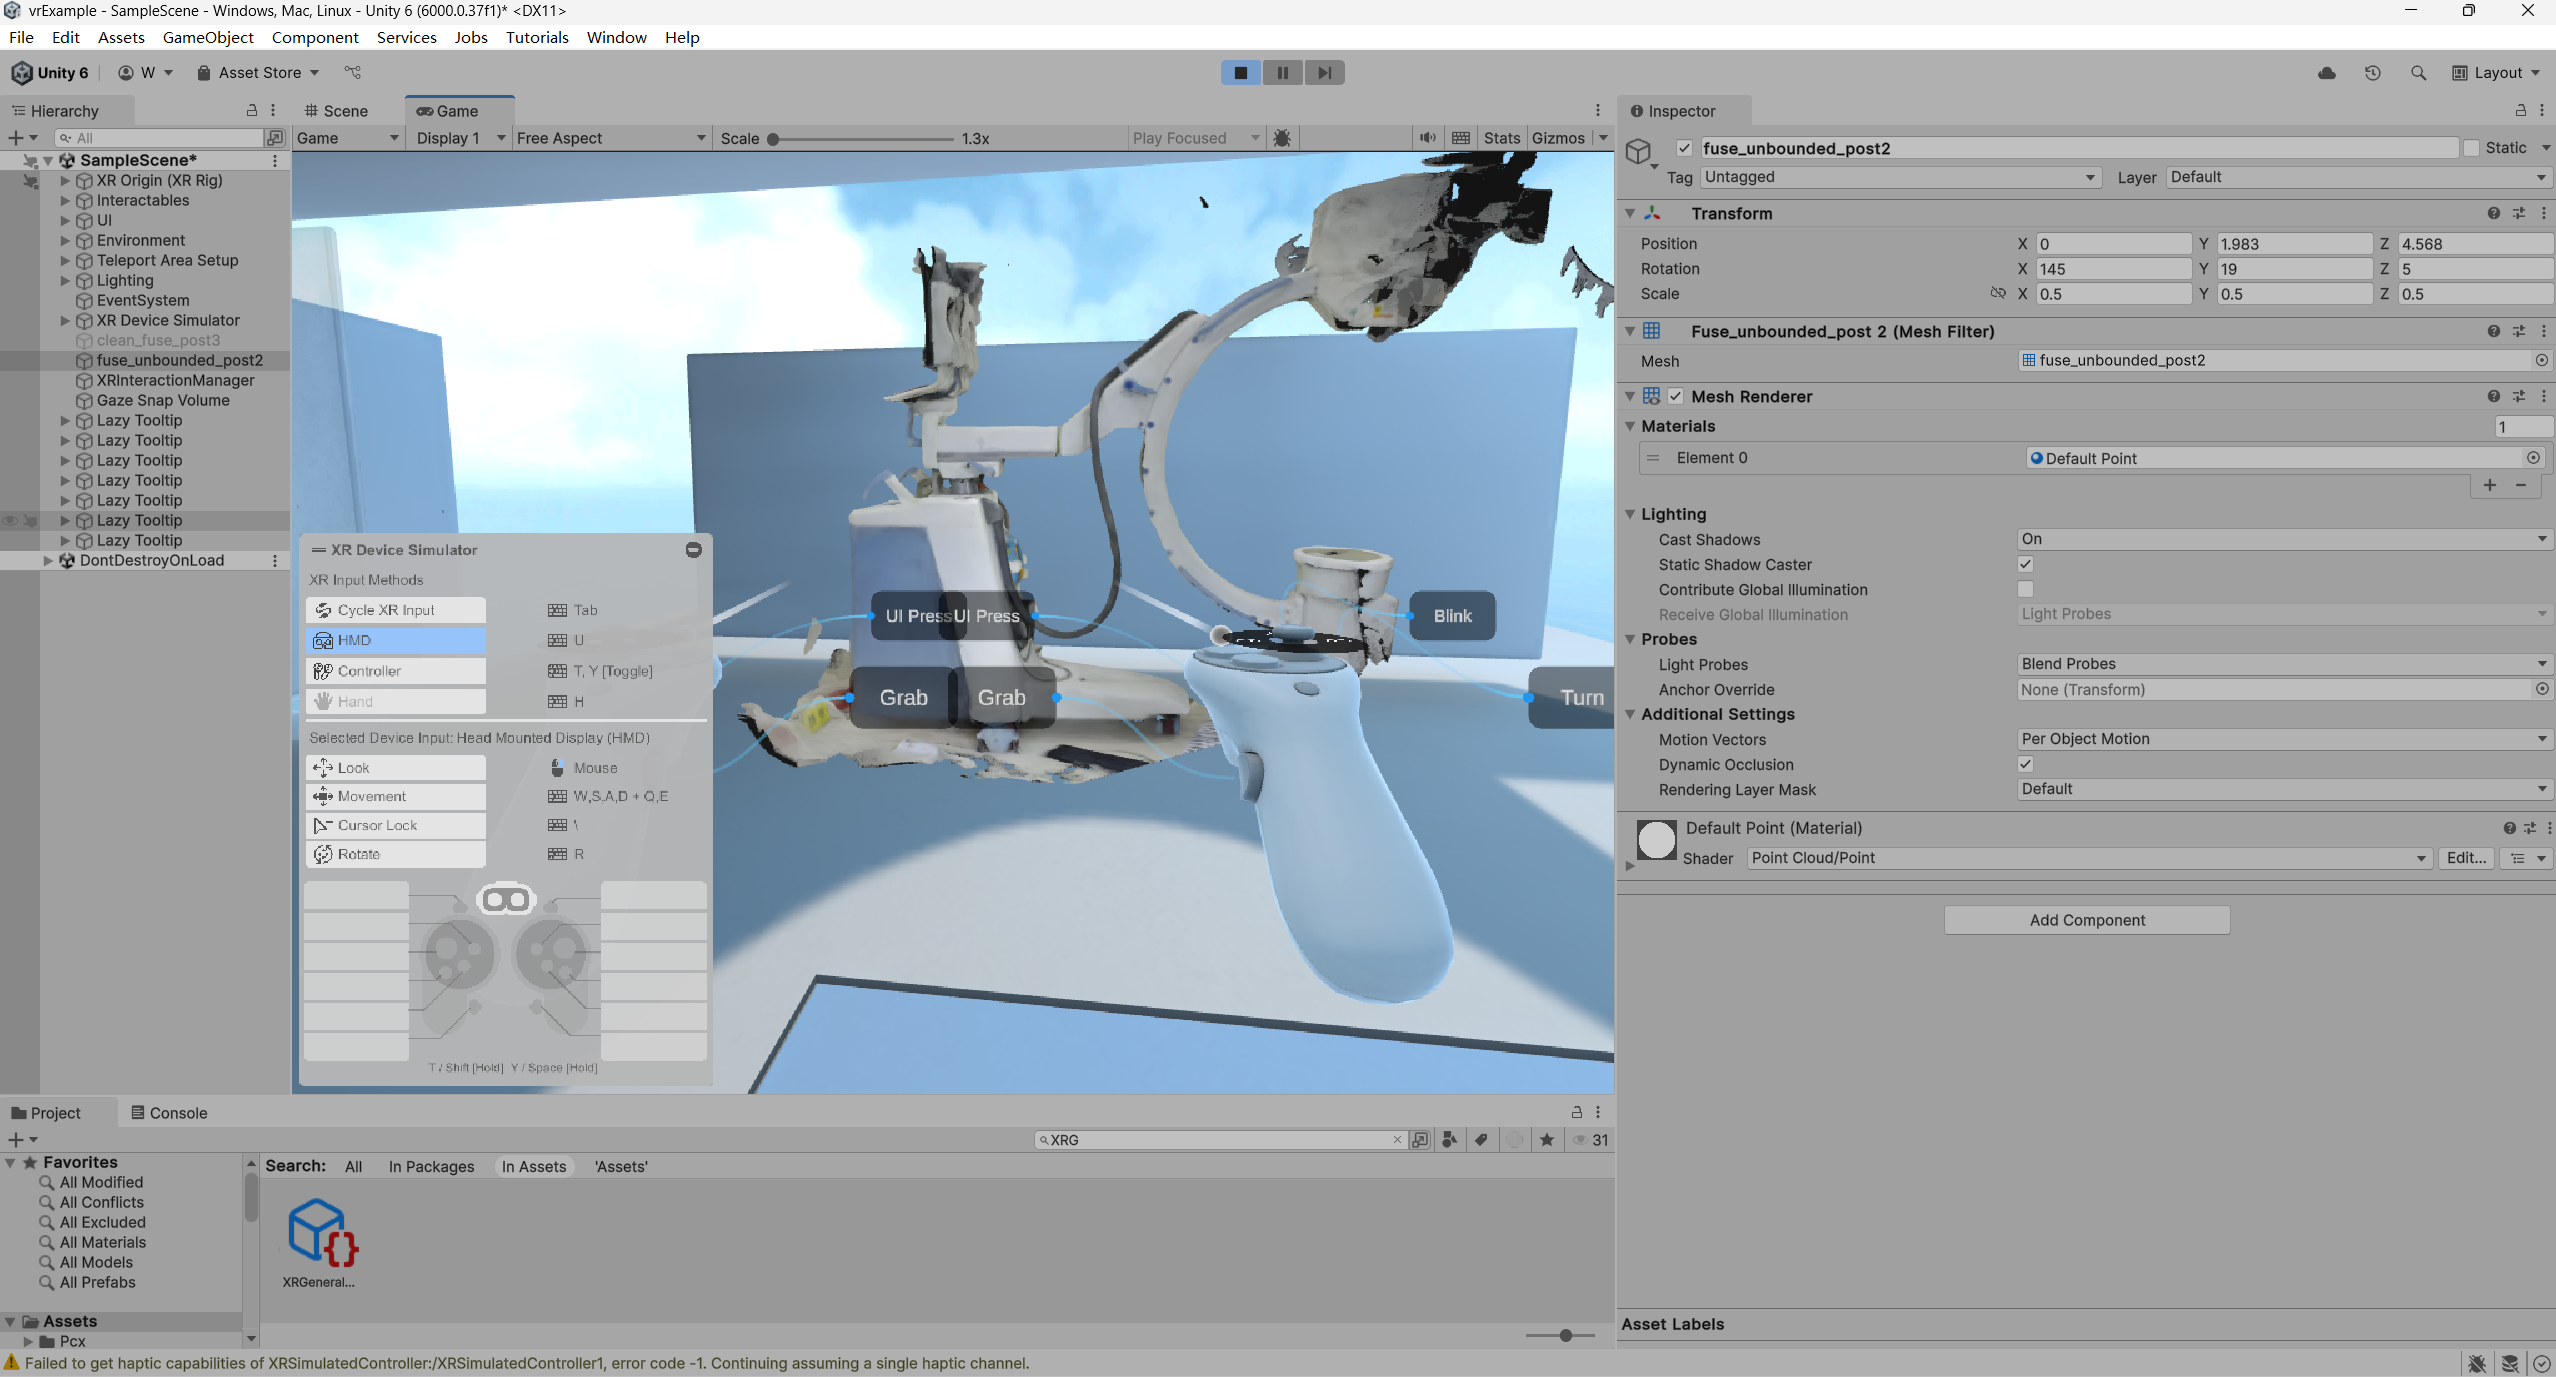
Unfortunately Unity does not natively support PLY meshes. Nonetheless, this limitation can be overcome by installing a free unity package to handle ply files. point-cloud-free-viewer. This point could free viewer package successfully imports PLY files as point cloud game object in Unity 6. This point cloud of C-arm machine looks impressive sitting at the corner in this Unity VR example scene.
Yet, interactive features such as rigid bodies, mesh colliders, and grab interactions are currently incompatible with pure point cloud objects, as the C-arm lacks a triangular mesh structure.
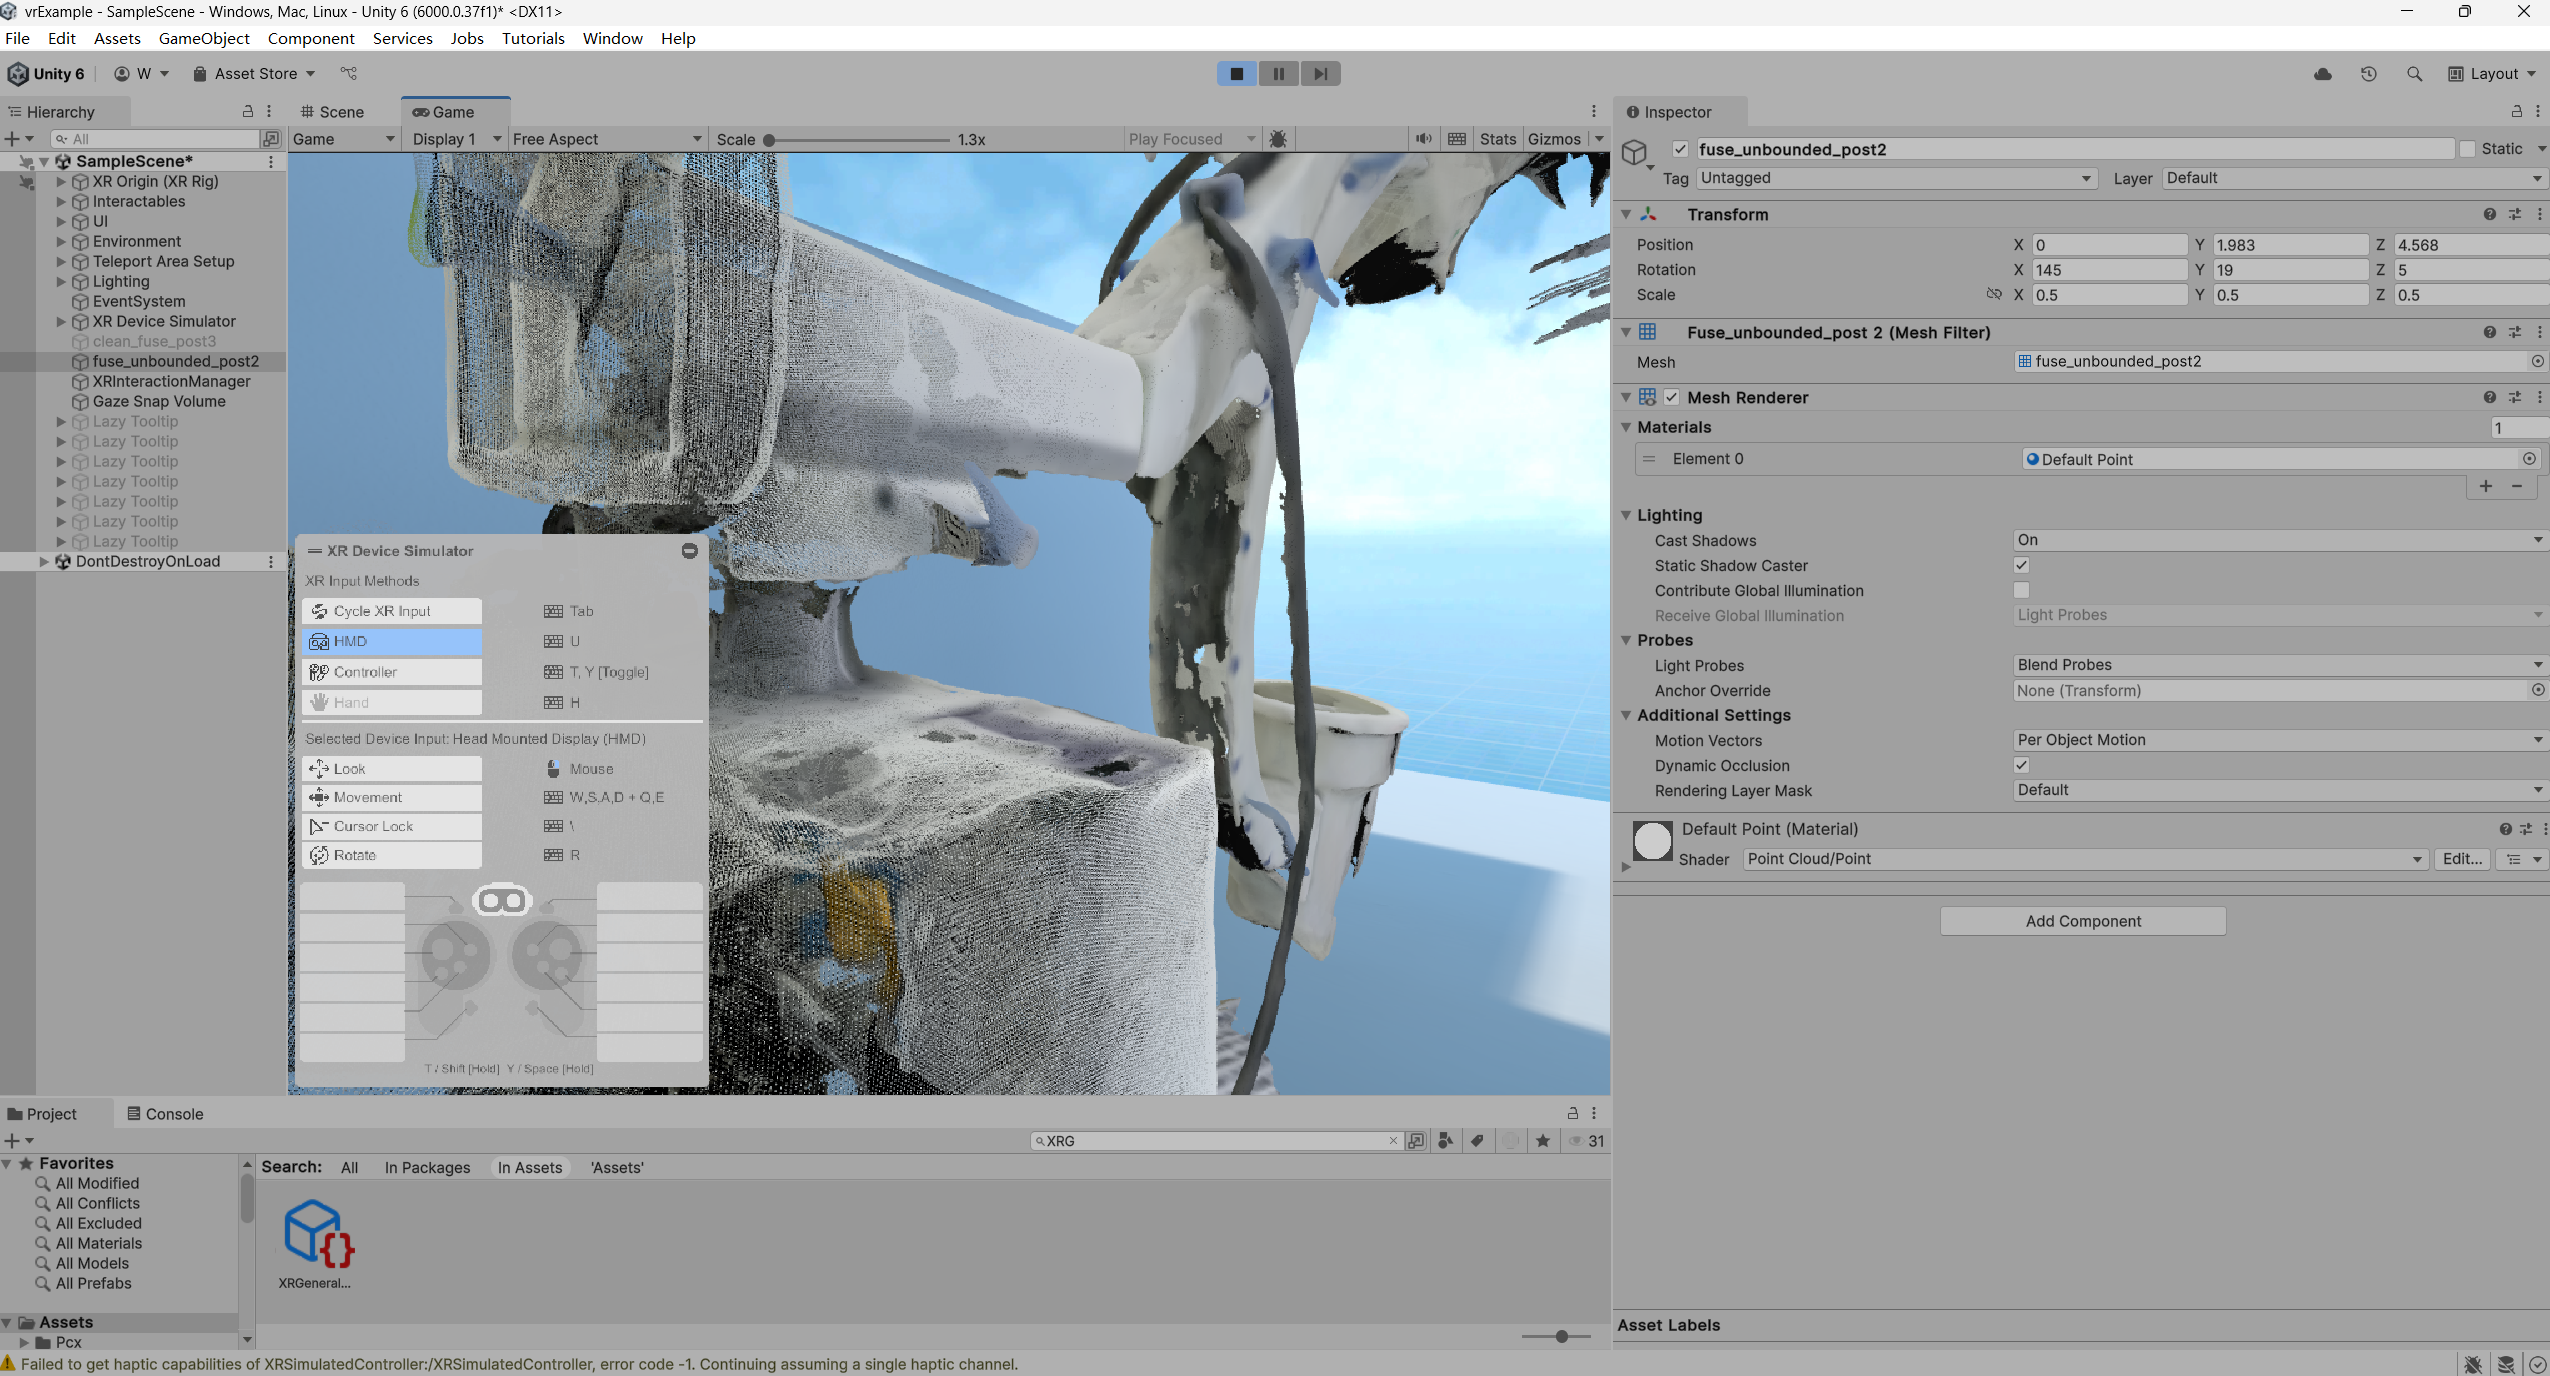
By converting the point cloud to a mesh in Blender, we can export it as an FBX file, which Unity readily imports as a game object. Once imported, adding XR grab interactable components allows the model to respond to physics — for example, falling and breaking under gravity (with gravity set to 9.8 m/s² in Unity). A handy Unity package is called Recorder, which helps me to record play mode / simulation mode into a video file. After further tuning and adjustments, better, prettier, sharper are obtained.
Virtual Reality Tutorial Example showing a Gaussian Splatting Pointcloud for a 2D C-arm Machine in Unity
Virtual Reality Tutorial Example showing a Gaussian Splatting Meshes become Interactables in Unity
Following up next is Gaussian Splatting - Failure, Success, and Lesson Learned